
Can you disable the touch screen on a laptop? Yes. After more than a decade of working with computer hardware, I’ve found this to be one of the most common requests from users dealing with everything from a glitchy screen to simple personal preference. This guide provides foolproof methods for any scenario you might face.
I go beyond simple steps to help you decide if disabling is right for you, understand the risks, and solve problems that other guides don’t cover. We’ll look at the ‘why’ and ‘what if’ scenarios, not just the ‘how’.
1. If disabling your touch screen is the right move?
Before jumping into the technical steps, it’s crucial to understand why you’re considering this and what the implications are. This isn’t just about turning a feature off; it’s about making an informed decision that improves how you use your device. Here is a quick comparison to help you decide.
| Pros of Disabling | Cons & Risks |
|---|---|
| Stops accidental touches and cursor jumps (‘ghost touch’). | Loss of a key feature for which you likely paid extra. |
| Can slightly improve battery life by powering down the digitizer. | Inconvenient for tasks that are faster with touch (e.g., signing documents, drawing). |
| Essential for troubleshooting a malfunctioning or cracked screen. | Registry edits, if done incorrectly, can cause system instability (the Device Manager method is safe). |
| Prevents unwanted input when cleaning the screen. | Windows Updates may occasionally re-enable the feature, requiring you to disable it again. |
1.1. Common reasons to turn off your touch screen
So, why would I disable my laptop’s touch screen in the first place? Based on my experience, users typically have one of these very valid reasons.
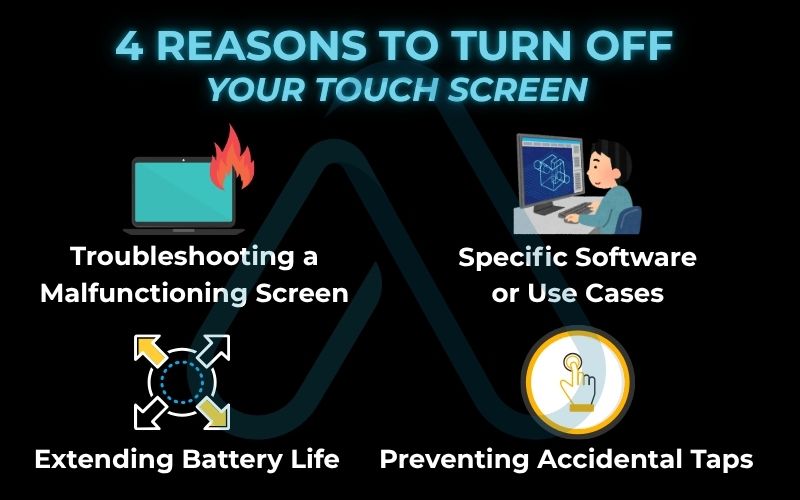
- Preventing Accidental Taps: Tired of your cursor jumping around while you type because your palm brushes the screen? Or maybe your cat likes to walk across your keyboard and touch the display. Disabling the touch screen is a common and effective fix.
- Troubleshooting a Malfunctioning Screen: A physically damaged or failing touch screen can generate random inputs, often called ‘ghost touch’ or ‘phantom touch’. This can make your laptop nearly unusable. Turning off the touch functionality is the primary solution.
- Extending Battery Life: While not a massive power draw, the touch screen digitizer does consume energy. If you’re trying to squeeze every last minute out of your battery, disabling features you don’t use, like the touch screen, can help.
- Specific Software or Use Cases: Some applications, particularly older ones, may not behave well with touch input. Disabling it ensures you only interact via the trackpad and keyboard, preventing compatibility issues.
1.2. Understanding the risks and warranty implications
A common question I get is, ‘Does disabling the touch screen affect my warranty?’ Generally, no—especially when using standard Windows tools like the Device Manager. The process is completely reversible and doesn’t alter your hardware. However, it’s important to understand the different levels of risk associated with each method.
Using the Device Manager is 100% safe. You are simply telling Windows to ignore a piece of hardware. When you dive into more advanced methods, the risk increases slightly.
| Warning The registry method to disable touch functionality in the registry is for advanced users only. A mistake in the Windows Registry can cause serious system instability or prevent Windows from starting. Always back up your registry before making any changes. |
1.3. Are there alternatives to disabling it completely?
If you’re hesitant to turn the feature off entirely, there are a few other things you can try first. I recommend exploring these options if your issue is minor.
- Calibrate the Touch Screen: Sometimes, erratic behavior is due to poor calibration. You can find the ‘Calibrate the screen for pen or touch input’ tool in the Windows Control Panel.
- Adjust Palm Rejection Settings: If your issue is accidental palm touches while typing, look for touch sensitivity or palm rejection settings in your laptop’s touchpad software (e.g., Synaptics, Elan).
- Use a Screen Protector: A high-quality matte screen protector can sometimes reduce sensitivity and help with minor phantom touch issues, though it’s not a guaranteed fix.
2. The primary method: Can you disable the touch screen on a laptop in Windows 11 & 10
For most users, the safest and easiest way to turn off a touch screen on a Windows laptop is through the Device Manager. This tool is built into all modern versions of Windows and gives you direct control over your computer’s hardware. The process is nearly identical for both Windows 11 touch screen settings and Windows 10.
2.1. Step-by-step guide using Device Manager
Follow these simple instructions to disable your touch screen. This process should take less than two minutes.
- Right-click the Start Menu button and select Device Manager from the list.
- In the Device Manager window, look for a category called Human Interface Devices (HID) and double-click it to expand the list. [Screenshot of Device Manager window with HID expanded]
- Look for a device named HID-compliant touch screen. The name should be a clear indicator. Right-click on it.
- From the context menu that appears, click on Disable device. [Screenshot of the right-click menu showing ‘Disable device’]
- A warning box will pop up asking, ‘Disabling this device will cause it to stop functioning. Do you really want to disable it?’ Click Yes.

That’s it! Your touch screen is now disabled. You don’t even need to restart your computer. If you wish to disable the HID-compliant touch screen again later, just follow the same steps.
What does 'HID-compliant' mean?
HID stands for ‘Human Interface Device’. It’s a standard classification for computer peripherals that humans use to interact with a computer, such as keyboards, mice, and, in this case, touch screens. Seeing ‘HID-compliant’ simply means the device follows this universal standard.
| Expert Tip If you see multiple HID-compliant devices and aren’t sure which one is the touch screen, you can try disabling them one by one. It’s easy to re-enable them if you pick the wrong one, so there’s no risk. |
2.2. The advanced method: using the registry editor (with caution)
This method is more permanent and can be useful if the touch screen keeps re-enabling itself. However, I must stress the importance of caution.
| WARNING: Proceed with Extreme Caution |
Editing the Windows Registry can be dangerous. I strongly recommend that you back up your registry before you begin. Incorrect changes can lead to system instability or failure. If you’re comfortable proceeding, here are the steps for a registry disable touch.
- Press Windows Key + R to open the Run dialog. Type
regeditand press Enter. - Navigate to the following key in the left-hand pane:
HKEY_CURRENT_USER\Software\Microsoft\Wisp\Touch - In the right-hand pane, right-click on an empty space and select New > DWORD (32-bit) Value.
- Name the new value TouchGate.
- Double-click on TouchGate and ensure its ‘Value data’ is set to 0. Click OK.
- Restart your computer for the change to take effect.


3. How to re-enable your laptop’s touch screen
If you change your mind or fix the underlying issue, re-enabling your touch screen is just as easy as disabling it. To enable touch screen in Device Manager, you’ll simply reverse the process.
- Open Device Manager by right-clicking the Start Menu button.
- Expand the Human Interface Devices (HID) category.
- Find your HID-compliant touch screen device. You may see a small down-arrow icon on it, indicating it’s disabled.
- Right-click on the device and select Enable device.
The touch functionality should return immediately without a reboot.
Common Pitfalls When Re-enabling
Forgetting which device you disabled: If you have many HID devices, it can be tricky. Look for the one with the disabled icon.
Needing a restart: While usually not required, if the screen doesn’t respond after re-enabling, a simple restart often resolves the issue.
Driver issues: In rare cases, the driver might become corrupted. If ‘Enable device’ doesn’t work, try selecting ‘Update driver’ from the same right-click menu.
4. Advanced touch screen troubleshooting
Tried the steps above, and it’s still not working? You’re not alone. After years of troubleshooting these issues, I’ve seen a few common roadblocks that can be frustrating. Here are solutions for the most frequent problems you might encounter during touch screen troubleshooting.
4.1. What if an ‘HID-compliant touch screen’ is missing from the device manager?
This is a surprisingly common issue. If you can’t find the device, don’t panic. It’s likely just hidden or needs a refresh. Here’s a checklist of actions to take.
- Show Hidden Devices: In Device Manager, click on the View menu at the top and select Show hidden devices. Sometimes, disabled devices don’t appear in the default view.
- Scan for Hardware Changes: With Device Manager still open, click on the Action menu and select Scan for hardware changes. This forces Windows to re-scan all connected hardware and can often make the missing device reappear.
- Check Manufacturer Drivers: Visit your laptop manufacturer’s support website (e.g., Dell, HP, Lenovo). Look for your specific model and download the latest chipset or touch screen drivers. Installing these can restore the device’s visibility in Device Manager.
4.2. How to stop the touch screen from re-enabling after a reboot or Windows update
This is one of the most annoying problems. You disable the touch screen, but after a restart or a Windows Update, it’s back on. This happens because Windows Update sometimes automatically ‘fixes’ what it sees as a disabled device by reinstalling the driver.
If you used the Device Manager method and are facing this issue, the more permanent Registry Editor method from section 2.2 might be your solution. Changes made in the registry are less likely to be overridden by an automatic update.
| Expert Tip for Windows Pro Users If you have a Pro version of Windows, you can use the Group Policy Editor for an even more robust solution. You can create a policy to prevent Windows from installing or updating drivers for that specific hardware ID, effectively blocking it from being re-enabled. |
5. Guides for other operating systems and devices
While this guide focuses on Windows, I know many of you use other devices. Here’s a quick rundown of how to handle touch screens on other popular platforms.
5.1. Disabling the touch screen on a Chromebook
On a Chromebook, disabling the touch screen is considered an experimental feature. The primary method involves using debug shortcuts or the Chrome OS Shell (crosh). A common command is: sudo ectool apen 0
Note that these methods can change with ChromeOS updates and may not work on all models. This is definitely for more advanced users who are comfortable with a command-line interface.
5.2. Instructions for older windows versions (8 and 7)
If you’re still using an older laptop, the good news is that the Device Manager method works almost identically. The core concept of finding and disabling the ‘HID-compliant touch screen’ remains the same. The only minor difference is how you access Device Manager.
- Windows 8: Right-click the bottom-left corner of the screen to bring up the Power User menu, where you’ll find Device Manager.
- Windows 7: Click the Start button, right-click on ‘Computer’, select ‘Properties’, and then click ‘Device Manager’ on the left.
5.3. The case of MacBooks: why there’s no touch screen to disable
I occasionally see users searching for how to disable a MacBook touch screen. The simple answer is: you can’t, because they don’t have them. Apple has a very clear design philosophy of keeping macOS a non-touch, indirect manipulation platform (mouse and keyboard), while iOS and iPadOS are their touch-first operating systems. Some users may confuse the Touch Bar on certain MacBook Pro models with a full touch screen, but the Touch Bar is a separate piece of hardware with its own limited functionality and cannot be disabled in the same way.
6. FAQs about disabling the touch screen on a laptop
Will disabling my touch screen improve my laptop’s performance?
The performance gain is minimal and not noticeable for most tasks. Disabling the touch screen won’t boost your CPU or GPU speed, but it can slightly reduce background CPU usage and system resource drain. The most noticeable effect might be a marginal improvement in battery life.
Is it possible to only disable touch in certain areas of the screen?
No, standard Windows tools only allow you to turn the entire touch functionality on or off. Disabling specific regions of the screen, such as a cracked area, typically requires specialized third-party software and is a very advanced use case beyond the scope of built-in controls.
Does disabling the touch screen also disable the stylus/pen?
Yes, in most cases, it does. The active pen/stylus and your finger use the same underlying hardware digitizer layer. When you disable the ‘HID-compliant touch screen’ device, you are turning off this entire layer, which will prevent both touch and pen input from being registered. I advise you to test your stylus after disabling to be sure, and re-enable the device if you need pen functionality.
Glossary of key terms
| Abbreviation | Full Term | Meaning |
|---|---|---|
| HID | Human Interface Device | A standard for computer peripherals that humans use to interact with a computer, like a mouse, keyboard, or touch screen. |
| OS | Operating System | The core software that manages all the hardware and software on a computer, such as Windows, macOS, or ChromeOS. |
| Registry | Windows Registry | A hierarchical database that stores low-level settings for the Microsoft Windows operating system and for applications that opt to use the registry. |
| Crosh | Chrome OS Shell | A command-line interface on Chromebooks, similar to the Command Prompt in Windows, is used for advanced diagnostics and settings. |
| CPU | Central Processing Unit | The primary component of a computer that executes instructions. It’s often referred to as the ‘brain’ of the computer. |
| GPU | Graphics Processing Unit | A specialized electronic circuit designed to rapidly manipulate and alter memory to accelerate the creation of images for output to a display device. |
7. Final thoughts
Disabling your laptop’s touch screen can be an incredibly useful solution for a variety of issues, from annoying phantom touches to maximizing battery life. As I’ve shown, the process is safe, simple, and completely reversible when done correctly. You are in full control of your hardware.
Here are the most critical takeaways from this guide:
- First, always consider if disabling the touch screen is the right move for you by weighing the pros and cons.
- For the safest and easiest method, always use the Device Manager in Windows. It’s risk-free and effective.
- If you run into trouble, don’t be afraid to use the advanced troubleshooting steps to find hidden devices or prevent re-enabling.
With this guide, you can confidently manage your laptop’s touch screen to fit your exact needs. For more in-depth guides on optimizing your hardware and software, explore our Productivity & Automation categories on Afdevinfo.