Tired of squinting at your small laptop screen? If you’re wondering how can you connect a laptop to a TV, you’ve come to the right place. It should be a simple task, but as I’ve seen countless times over my decade in tech, it’s often a source of major headaches – from finding the right cable to battling mysterious connection errors. This guide is different. I’ve designed it to be your ultimate troubleshooter and compatibility solver, cutting through the confusion to give you clear, actionable steps for a perfect picture, every time.
Here’s what I’ll walk you through:
- Master both wired and wireless connections, from the reliability of HDMI to the convenience of AirPlay and Chromecast.
- Instantly solve compatibility questions with my definitive port-and-adapter matrix.
- Solve any connection issue with our expert troubleshooting checklist for problems like ‘no signal,’ bad resolution, or missing audio.
1. Which connection method is right for you?
Before you even touch a cable, the most critical step is deciding on the best connection method for your specific needs. Many guides skip this, but in my experience, choosing correctly upfront prevents 90% of all potential issues. I’ve broken it down into a simple decision-making process based on what you want to do and what hardware you have.
First, understand the core difference: wired connections (like HDMI) offer the most stable, high-quality, and lag-free signal, making them ideal for gaming and high-resolution movies. Wireless connections offer incredible convenience but can be susceptible to lag and interference, making them better for presentations or casual streaming. To help you choose, I recommend following this simple logic: For high-performance needs like gaming, a wired connection is non-negotiable. For convenience in presentations or streaming, wireless is excellent. I’ve summarized the best use-cases for each technology in the table below.
| Connection Type | Best For | Pros | Cons |
|---|---|---|---|
| HDMI | Gaming, 4K Movies, General Use | Highest quality, zero lag, carries audio | Requires a physical cable |
| USB-C | Modern Laptops (MacBooks, Ultrabooks) | Single cable for video, data, and power (on some TVs) | Requires a compatible USB-C port (Thunderbolt/DP Alt Mode) |
| Miracast (Wireless) | Windows Laptops, Presentations | Built into most Windows PCs and Smart TVs, no dongle needed | Can have noticeable lag, not ideal for gaming |
| AirPlay (Wireless) | MacBooks, iPhones, iPads | Seamless integration with Apple ecosystem | Requires an Apple TV or AirPlay-compatible Smart TV |
| Chromecast (Wireless) | Browser Casting, Android devices, Cross-platform use | Easy to use, relatively inexpensive dongle | Primarily works from the Chrome browser or supported apps |
2. Match your laptop port to your TV input
Here’s where my promise to be your ‘compatibility solver’ comes to life. Nothing is more frustrating than having a cable that doesn’t fit. This matrix is your definitive guide to understanding what ports you have and what, if anything, you need to connect them. I’ve seen every combination imaginable, and this table covers them all.
Take a quick look at the ports on the side of your laptop and the back of your TV, then find your combination in the table below to see exactly what you need.
| Laptop Port (with icon) | TV Input (with icon) | Direct Connection Possible? | Adapter Needed (if any) |
|---|---|---|---|
| HDMI [HDMI icon] | HDMI [HDMI icon] | Yes | None. A standard HDMI cable is all you need. |
| USB-C / Thunderbolt 3/4 [USB-C/lightning icon] | HDMI [HDMI icon] | No | A USB-C to HDMI adapter or cable. This is one of the most common adapters I recommend for modern laptops. |
| USB-C / Thunderbolt 3/4 [USB-C/lightning icon] | USB-C [USB-C icon] | Yes (on newer TVs) | A USB-C to USB-C cable that supports video (Thunderbolt 3/4 or USB 3.1 Gen 2). |
| DisplayPort / Mini DisplayPort [DP icon] | HDMI [HDMI icon] | No | A DisplayPort to HDMI adapter or cable. |
| VGA [VGA icon] | HDMI [HDMI icon] | No | A VGA to HDMI converter (must be an active adapter) and a separate 3.5mm audio cable. |
3. The wired connection guide for a perfect picture
Once you’ve identified the right cable or adapter, making a wired connection is usually straightforward. I’ll walk you through the most common methods, focusing on the key actions you need to take to get from a blank screen to a perfect picture.
3.1. Using an HDMI cable the gold standard
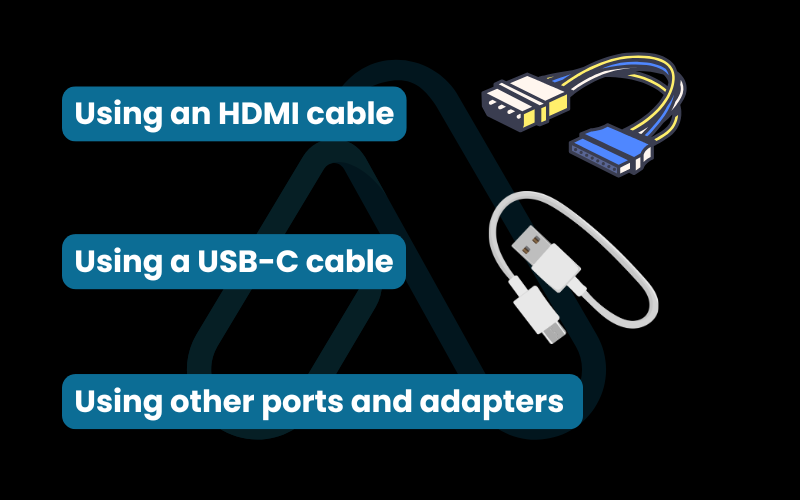
To connect your laptop to a TV with HDMI is the most common and reliable method I recommend for most people. The process is almost universally plug-and-play and carries both high-definition video and audio over a single cable.
Here are the simple steps to follow:
- Connect the HDMI cable to the HDMI port on your laptop.
- Connect the other end of the cable to an available HDMI input port on your TV. Note which input you used (e.g., HDMI 1, HDMI 2).
- Select the correct input source on your TV using the ‘Input’ or ‘Source’ button on your TV remote.
- Configure your display settings on your laptop. Press the Windows Key + P on a Windows PC or go to System Settings > Displays on a Mac to choose your display mode.
Display Modes Explained:
Most operating systems give you three main choices. ‘Duplicate’ shows the same thing on both screens. ‘Extend’ uses the TV as a second desktop, giving you more space. ‘Second Screen Only’ turns off your laptop screen and uses only the TV, which is great for movies.
3.2. Using a USB-C cable the modern all-in-one solution
A common question I get is, ‘Can I use USB-C to connect my laptop to my TV?’ Yes, you can absolutely use USB-C, but there’s a critical detail you need to check first. Not all USB-C ports are created equal; only those that support DisplayPort Alt Mode or Thunderbolt can output video.
| WARNING: Look for a small DisplayPort symbol (a ‘D’ shape) or a Thunderbolt symbol (a lightning bolt) next to your laptop’s USB-C port. If you don’t see one of these, the port likely does not support video output. |
Once you’ve confirmed your port is compatible, here is how you connect it:
- If your TV has a USB-C input: Simply connect a video-capable USB-C cable from your laptop to the TV.
- If your TV only has HDMI inputs: Connect a USB-C to HDMI adapter to your laptop, and then connect a standard HDMI cable from the adapter to the TV.
- Select the correct input source on your TV remote (either USB-C or the corresponding HDMI port). Your laptop should automatically detect the display.
3.3. Using other ports and adapters (DisplayPort, VGA)
If you’re working with older or more specialized hardware, you might encounter DisplayPort or even VGA ports. I see these less and less, but it’s important to know how to handle them if you do. DisplayPort is common on business laptops and gaming hardware and can be easily converted to HDMI with a simple adapter. VGA is an analog legacy port that requires more work.
For a VGA connection, you will need the following components:
- A VGA cable.
- An active VGA-to-HDMI adapter (this converts the analog signal to digital).
- A separate 3.5mm male-to-male audio cable, as VGA does not carry sound. This will run from your laptop’s headphone jack to the audio input on the adapter or TV.
4. The wireless connection guide to cut the cord and share your screen
For presentations and casual viewing, nothing beats the convenience of a wireless connection. Before we dive into the specific technologies, let me share the single most important rule I’ve learned from years of troubleshooting: For any wireless connection to work, your laptop and TV (or streaming device) MUST be connected to the exact same Wi-Fi network. This is the #1 reason wireless connections fail.
4.1. Connecting with Miracast or Chromecast for Windows PCs
Windows has excellent built-in support for wireless screen mirroring. The primary technology is Miracast, which is supported by most modern smart TVs. If your TV doesn’t support Miracast, a Google Chromecast is a fantastic and affordable alternative for your laptop to smart TV connection.
Here’s how to connect using Windows’ built-in features:
- Ensure both your Windows laptop and your Miracast-compatible TV or Chromecast device are on the same Wi-Fi network.
- On your laptop, press the Windows Key + K. This will open the ‘Connect’ panel.
- Windows will scan for available wireless displays. Select your TV or Chromecast from the list.
- If prompted, you may need to ‘Allow’ the connection on your TV screen.
- To cast from the Chrome browser specifically (for a Chromecast PC to TV connection), click the three-dot menu in the top right, select ‘Cast…’, and choose your Chromecast device. You can then choose to cast a single tab or your entire desktop.
4.2. Connecting with AirPlay for Macbooks
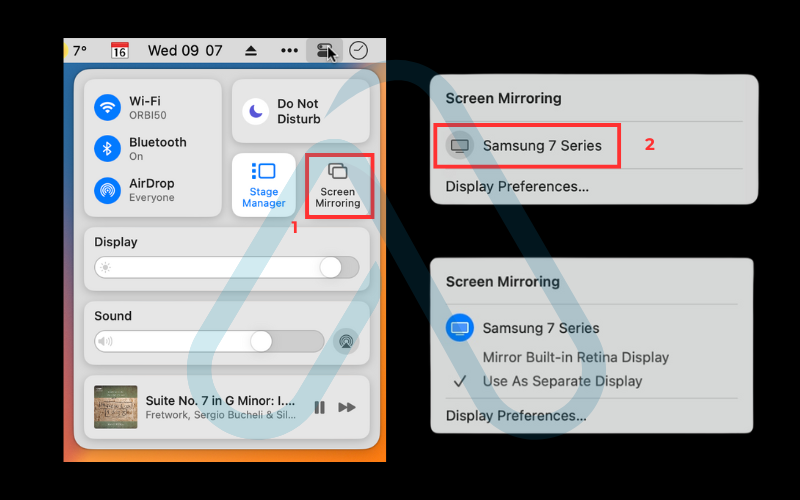
For Mac users, Apple’s AirPlay technology provides a seamless way to share your screen. I find the integration within the Apple ecosystem to be incredibly smooth, provided you have the right hardware. To achieve an AirPlay laptop to TV connection, you will need an AirPlay-compatible smart TV (many modern TVs from Samsung, LG, Sony, etc., have this built-in) or an Apple TV box connected to your television.
Follow these steps to mirror your MacBook’s display:
- Confirm your MacBook and your AirPlay-compatible TV or Apple TV are on the same Wi-Fi network.
- Click the Control Center icon in the macOS menu bar (it looks like two sliders).
- Click the Screen Mirroring button.
- Select your TV or Apple TV from the list of available devices. Your screen should now appear on the TV.
- You can also go into System Settings > Displays to configure whether the TV mirrors your built-in display or acts as a separate, extended display.
5. The advanced troubleshooting checklist for fixing any connection problem
This is the section that other guides often miss. After helping hundreds of people with this exact task, I’ve compiled a checklist of the most common issues and their solutions. When something goes wrong, don’t panic. Systematically work through these steps, and you’ll find the fix.
5.1. How can you connect a laptop to a TV if HDMI isn’t working?
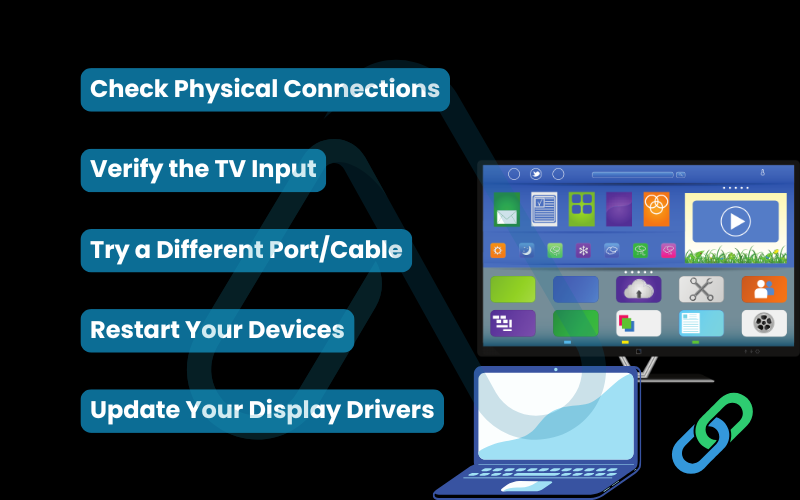
The dreaded ‘No Signal’ message is the most common issue, especially with HDMI. If you’re struggling with how to connect your laptop to the TV because nothing is showing up, here is my 5-step fix-it plan, starting with the simplest solutions first.
Here is my recommended diagnostic plan:
- Check Physical Connections: This sounds obvious, but I have to say it. Unplug the HDMI cable from both the laptop and the TV, and plug it back in firmly. A loose connection is a very common culprit.
- Verify the TV Input: Double-check that you have selected the correct input source on your TV with your remote (e.g., HDMI 1, HDMI 2, etc.).
- Try a Different Port/Cable: If you have another HDMI port on your TV, try it. If that doesn’t work, try a different HDMI cable. Cables can and do fail.
- Restart Your Devices: With everything connected, restart your laptop. This forces it to re-detect any connected displays.
- Update Your Display Drivers: If all else fails, the issue could be with your laptop’s graphics drivers. Go to the manufacturer’s website (e.g., Intel, NVIDIA, or AMD) and download the latest drivers for your model.
5.2. How do I fix display scaling, wrong resolution, or cropped edges?
Sometimes you get a picture, but it doesn’t look right – the edges might be cut off, or everything looks too big or too small. This is usually a resolution mismatch or a TV setting called ‘Overscan’. The fix might actually be on your TV, not your laptop, a key insight many people miss.
Here’s how to tackle it:
- On Windows: Right-click on your desktop and select ‘Display settings’. Choose your TV display, then scroll down to ‘Display resolution’. Ensure it is set to the recommended resolution (e.g., 1920 x 1080 or 3840 x 2160). You can also adjust the ‘Scale’ setting here.
- On macOS: Go to ‘System Settings’ > ‘Displays’. Select your TV. You’ll see options to adjust the resolution. Choose ‘Default for display’ first. If that doesn’t work, you can select ‘Scaled’ to try other resolutions.
- Check TV Overscan Settings: Grab your TV remote, go into the TV’s settings menu, and look for a ‘Picture’, ‘Aspect Ratio’, or ‘Advanced’ menu. Look for a setting called ‘Overscan’, ‘Fit to Screen’, ‘1:1’, or ‘Just Scan’. You want to turn Overscan OFF or select the ‘Fit to Screen’ option. This usually solves any cropped edge issues instantly.
5.3. What should I do if there is no sound from my TV?
You have a beautiful picture, but the sound is still coming from your laptop’s tiny speakers. This is a frequent pain point, especially with HDMI, but it’s an easy fix. Your computer just needs to be told where to send the audio.
I recommend this simple audio troubleshooting checklist:
- Select the Correct Playback Device: This is the most common solution. On Windows, right-click the speaker icon in the taskbar, select ‘Sound settings’, and under ‘Output’, choose your TV from the dropdown menu. On a Mac, hold the Option key and click the speaker icon in the menu bar to select your TV as the output device.
- Check TV Volume: Make sure your TV’s volume is turned up and that it isn’t muted. It’s a simple step, but one I’ve seen overlooked many times.
- Check Application Volume: Ensure the volume within the application you’re using (like YouTube or a media player) is also turned up.
- Reconnect the Cable: A poor HDMI connection can sometimes transmit video but fail on the audio handshake. Unplugging and replugging the cable can sometimes resolve this.
5.4. How do I diagnose a laggy or stuttering wireless connection?
The biggest downside to wireless mirroring is performance. If your stream is choppy or your mouse cursor is lagging, it’s almost always a Wi-Fi issue. Before you give up, there are several things I recommend you try to troubleshoot your laptop TV connection.
Here’s a list of effective solutions:
- Reduce Distance: The single biggest factor for wireless speed is the distance between your devices and your Wi-Fi router. Move your laptop and/or router closer together.
- Minimize Interference: Other Wi-Fi networks, microwaves, and even Bluetooth devices can cause interference. Try changing your router’s Wi-Fi channel in its settings to a less congested one.
- Close Background Applications: Streaming video from your laptop requires processing power. Close unnecessary applications and browser tabs on your laptop to free up resources.
- Use a Wired Internet Connection for the Laptop: If possible, connecting your laptop to your router with an Ethernet cable can drastically improve the stability of the wireless stream to your TV.
- Remember the Limits: I have to be honest – wireless mirroring is not ideal for fast-paced gaming. The inherent latency will always be a disadvantage compared to a wired connection.
6. Multi-screen and home theater setups
For those of you who are a bit more tech-savvy, a TV can be more than just a second screen. I’ve used TVs as part of complex multi-monitor setups for years, and they can be a fantastic, large-format addition to your workspace or a central component of a home theater.
You can easily use a TV as a third monitor. Simply connect it using one of the methods above and set your display mode to ‘Extend’. You can then arrange the displays in Windows or macOS settings so your mouse moves seamlessly between them. For a true home theater experience, the ideal signal path is from your laptop to an AV (Audio/Video) receiver via HDMI, and then from the receiver to the TV.
This allows the receiver to process high-fidelity surround sound and pass the video signal to the display. Be aware of potential HDCP (High-bandwidth Digital Content Protection) errors, which can sometimes occur in these complex chains. Using high-quality, certified HDMI cables can help prevent these issues.
7. Is screen mirroring safe? Protecting your privacy and security
One question that often gets ignored is whether screen mirroring is safe and private. In most home situations, it’s perfectly secure. However, the risk increases dramatically when you’re on a public or untrusted network, like in a hotel, airport, or conference room. Anyone on that same network could potentially see your device when you try to cast and, in some cases, could even try to cast to your screen or vice versa.
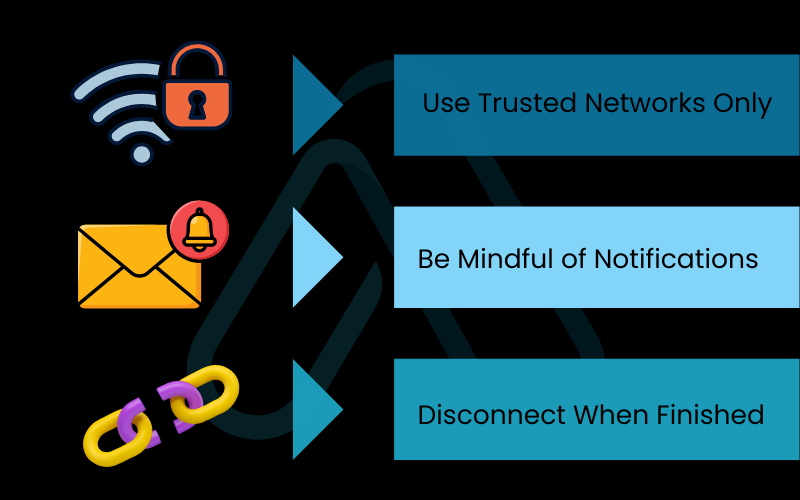
Based on my cybersecurity experience, I’ve established three golden rules for safe screen sharing. Following these will protect your privacy.
The 3 Golden Rules of Safe Screen Sharing:
- Use Trusted Networks Only: Never mirror your screen on a public Wi-Fi network where you don’t control who is connected.
- Be Mindful of Notifications: When mirroring your entire desktop, any incoming email, chat message, or password reminder will be displayed for all to see. Use ‘Do Not Disturb’ mode to suppress notifications during a presentation.
- Disconnect When Finished: As soon as you are done sharing, be sure to disconnect the wireless display. Don’t just close your laptop, as the connection can sometimes persist.
8. FAQs about how can you connect a laptop to a tv
I’ve gathered some of the most common follow-up questions I receive about connecting laptops to TVs. Here are some quick, direct answers to help you out.
Can I connect my laptop to any TV?
Yes, most modern TVs can connect to a laptop. The key is matching the right ports, typically HDMI or USB-C. Even older TVs can work with adapters, though setup may be trickier.
Do I need to install software to connect my laptop to a TV?
No. HDMI and USB-C connections are plug-and-play, and wireless options like Miracast (Windows) or AirPlay (Mac) are built in. Avoid third-party “connection software” downloads.
Will connecting my laptop to a TV slow it down?
Not for light use like streaming or browsing. However, gaming or editing in 4K can strain your graphics card and slightly reduce performance.
How do I make the TV my only screen?
On Windows, press Windows + P and choose “Second screen only.” On Mac, connect the TV, then close the laptop lid. Adjust Energy Saver settings if your Mac sleeps when closed.
Glossary of key terms
To help you navigate this guide, I’ve defined some of the technical terms used throughout the article.
| Abbreviation | Full Term | Meaning |
|---|---|---|
| HDMI | High-Definition Multimedia Interface | A standard for sending high-quality video and audio over a single cable. It’s the most common port on TVs and many laptops. |
| USB-C | Universal Serial Bus Type-C | A modern, reversible connector type. Some USB-C ports support video output via protocols like DisplayPort Alt Mode or Thunderbolt. |
| DP | DisplayPort | A digital display interface mainly used on computer monitors and some business laptops. Can be adapted to HDMI. |
| VGA | Video Graphics Array | An old, analog video-only connector. It’s largely obsolete but still found on some older devices and projectors. |
| Miracast | Miracast | A wireless display standard that allows devices to mirror screens to each other. It is built into Windows and many smart TVs. |
| AirPlay | AirPlay | Apple’s proprietary wireless streaming protocol for sending video and audio between its devices (like MacBooks and Apple TV). |
| Chromecast | Chromecast | A line of digital media players developed by Google. It allows users to stream content to a TV from a computer or mobile device. |
| HDCP | High-bandwidth Digital Content Protection | A form of copy protection to prevent digital video and audio content from being copied as it travels across connections. |
| Overscan | Overscan | A legacy feature of TVs where the edges of the picture are cropped. Disabling this is often necessary for a clear computer display. |
| Thunderbolt | Thunderbolt | A high-speed interface developed by Intel and Apple that carries data and video over a USB-C connector. |
9. Final thoughts
Connecting your laptop to a TV opens up a world of possibilities, from immersive movie nights to more productive work sessions. As we’ve covered, the process can be simple if you approach it systematically. I’ve distilled my years of experience into this guide to empower you to get it right the first time and solve any issues that arise.
To ensure a perfect connection every time, remember these three keys:
- Choose Your Method First: Decide between the stability of a wired connection and the convenience of wireless based on your specific needs before you begin.
- Verify Compatibility: Use my compatibility matrix to check your laptop and TV ports so you know exactly which cable or adapter you need.
- Troubleshoot Systematically: If you hit a snag, don’t guess. Follow the step-by-step checklists for ‘no signal,’ bad resolution, or missing audio to quickly pinpoint and solve the problem.
I’m confident that with this guide, you can connect your devices with ease. At Afdevinfo, our goal is to demystify technology and turn complex challenges into simple solutions. For more in-depth guides to help you master your digital world, I invite you to explore our Productivity & Automation categories.


