In my experience working with computer hardware, I’ve found that knowing how to connect 2 monitors to a laptop is one of the single biggest productivity boosters you can unlock. It’s a true game-changer. At Afdevinfo, where we focus on empowering professionals, transforming your single-screen laptop into a multi-display command center is a fundamental step towards greater efficiency.
This guide is based on the hundreds of setups I’ve personally configured and troubleshooted, designed to walk you through the entire process, from checking compatibility to optimizing your new workspace.
In this guide, you’ll learn:
- How to check if your laptop supports dual monitors.
- The best methods to connect 2 external displays (USB-C, HDMI, docking station).
- Step-by-step instructions for Windows and macOS setup.
- Common issues and how to fix them.
- Pro tips to protect your laptop ports and keep your system running smoothly.
1. Can your laptop actually handle two external monitors?
Boosting your productivity with a dual monitor setup is a fantastic goal, but before you buy any cables or monitors, let’s run a quick 2-minute check to ensure your laptop is up to the task. This is the most important step. Many frustrations arise from a simple hardware mismatch, so I always start here to save time and money. To successfully connect external monitors, we need to confirm your laptop’s capabilities by looking at its physical connections and internal power.
Here’s your pre-flight checklist. We’ll be looking at three key things:
- Your laptop’s available video output ports.
- Your laptop’s Graphics Processing Unit (GPU) specifications.
- The types of cables or adapters you’ll need to make the connection.
1.1. Identifying your laptop’s video ports
First, take a physical look at the sides of your laptop. The ports are the gateways to your external screens, and identifying them correctly is essential for a dual monitor setup. Most modern laptops will have a combination of the ports below. Here is a quick guide to help you identify your laptop display ports:
| Port Type | Icon | What it looks like | Common Use Case |
|---|---|---|---|
| HDMI | HDMI Logo | A six-sided, trapezoidal port, wider at the top. | The most common video port on laptops and TVs. One port supports one monitor. |
| DisplayPort (DP) | A ‘D’ shape with a ‘P’ inside. | A rectangular port with one corner angled off. | Common on business laptops and gaming monitors. Can support multiple monitors from a single port on Windows (via MST). |
| USB-C | A lightning bolt (Thunderbolt) or a ‘D’ symbol (DisplayPort Alt Mode). | A small, oval-shaped, reversible port. | The most versatile port, but not all USB-C ports support video. You must have one with the Thunderbolt or DisplayPort symbol next to it. |
| VGA/DVI | N/A | Older, larger ports. VGA is blue and has 15 pins; DVI is white and has more pins. | Found on older laptops and monitors. These are becoming rare but are still functional. |
The crucial point here is about USB-C. A standard USB-C port is for data and power only. For video, you need a USB-C port that supports either Thunderbolt (indicated by a lightning bolt icon) or DisplayPort Alternate Mode (a ‘D’ icon). If your USB-C port has no icon, consult your laptop’s manual. The ideal scenario for a simple dual monitor setup is having two distinct video ports, like one HDMI and one video-enabled USB-C.
1.2. Checking your laptop’s graphics capabilities (GPU)
Next, we need to check the ‘brain’ that powers the displays: the Graphics Processing Unit (GPU). Think of your laptop’s GPU as a juggler. Each monitor is a ball. We need to find out how many balls it can handle at once. The good news is that I can reassure you most laptops made in the last 5-6 years can easily support at least two monitors. This step is just a final confirmation. Here’s how to quickly find your GPU model.
For Windows users:
- Right-click the Start button and select ‘Device Manager’.
- Expand the ‘Display adapters’ section.
- You will see the name of your GPU, for example, ‘Intel UHD Graphics’ or ‘NVIDIA GeForce RTX 3060’.
For macOS users:
- Click the Apple menu in the top-left corner.
- Select ‘About This Mac’.
- In the overview tab, your graphics card will be listed next to ‘Graphics’.
Once you have the model name, a quick web search like “Intel UHD Graphics max monitors” will take you to the manufacturer’s official specification page, which will explicitly state how many displays it supports.
1.3. Your compatibility flowchart for a quick self-assessment
To pull it all together, I’ve created this simple decision-making process to guide you. Follow these questions to find your exact path forward.
- Question 1: Does my laptop have two or more dedicated video ports (e.g., 1 HDMI + 1 DisplayPort/Thunderbolt USB-C)?
- Yes: Great! You can connect your monitors directly. Proceed to Section 2.1 for instructions.
- No: Go to Question 2.
- Question 2: Does my laptop have at least one Thunderbolt USB-C or a DisplayPort?
- Yes: You can use an adapter, hub, or docking station to create two video outputs. Proceed to Section 2.2 or Section 3.
- No (you only have one HDMI and standard USB ports): Your best and most reliable solution is a DisplayLink-enabled docking station. Proceed to Section 3 for more details.
2. A step-by-step guide for how to connect 2 monitors to a laptop
Once you’ve confirmed your laptop is ready and you have the right cables, it’s time to make the physical connection. From my experience, it’s always best practice to power down your laptop and monitors before connecting or disconnecting cables to prevent potential hardware glitches. This section covers the most common scenarios I encounter.
2.1. Direct connection using two native ports
This is the simplest and most reliable method if your laptop supports it. It requires no extra hardware beyond the standard monitor cables. Here is the checklist to follow:
- Plug one end of the first monitor’s cable (e.g., HDMI) into the monitor and the other end into the corresponding port on your laptop.
- Repeat the process for the second monitor using its cable and a different port on your laptop (e.g., a video-enabled USB-C port).
- Power on both external monitors.
- Finally, power on your laptop. It should automatically detect the new displays.
2.2. Using a single port with an adapter or hub
This is a very common situation for modern ultrabooks with limited ports. If you have a single powerful port like Thunderbolt or USB-C with DisplayPort Alt Mode, you can use an adapter to create multiple video outputs. For this, you might use a device like a USB-C to dual HDMI adapter. However, there’s a critical difference between Windows and Mac systems that you must understand.
| Expert Tip for Mac vs. Windows: Windows laptops can use a feature called Multi-Stream Transport (MST), which allows a single DisplayPort or USB-C port to run multiple independent displays. Most dual-display adapters are built for this. Standard Apple MacBooks (with M1/M2 chips) do not support MST, so these adapters will only mirror the two external displays. Mac users need a more powerful Thunderbolt dock or a specific DisplayLink-enabled dock (more on that in Section 3) to extend to two external screens. |
2.3. The HDMI splitter trap and why it won’t work for extending displays
I see this mistake all the time. A user has one HDMI port and buys an ‘HDMI splitter’, thinking it will let them connect two monitors. It won’t work for what you want to do. An HDMI splitter only duplicates a single video signal and sends that identical signal to multiple screens. It cannot create a second, independent desktop.
Myth Buster:
Think of an HDMI splitter like a Y-cable for headphones; both people hear the exact same audio. It can’t play two different songs at once. For extending your desktop, you need a device that can handle multiple, unique video streams, like a docking station or a proper MST hub.
3. Using docking stations for ultimate connectivity
If you’re a remote professional or power user, a docking station for your laptop is the ultimate solution. It solves the problem of limited ports and provides a clean, single-cable setup for your entire desk. It’s an investment in convenience and productivity that I highly recommend for permanent or semi-permanent desk setups.
To help you decide, here is a quick comparison:
| Feature | Adapter / Hub | Docking Station |
|---|---|---|
| Price | Low ($20 – $70) | High ($100 – $300+) |
| Number of Displays | Typically 1-2 | Typically 2-4 |
| Extra USB Ports | Few, if any | Many |
| Ethernet Port | Sometimes | Almost always |
| Power Delivery | Limited or none | Yes, often powers/charges the laptop |
3.1. When a docking station is the right choice
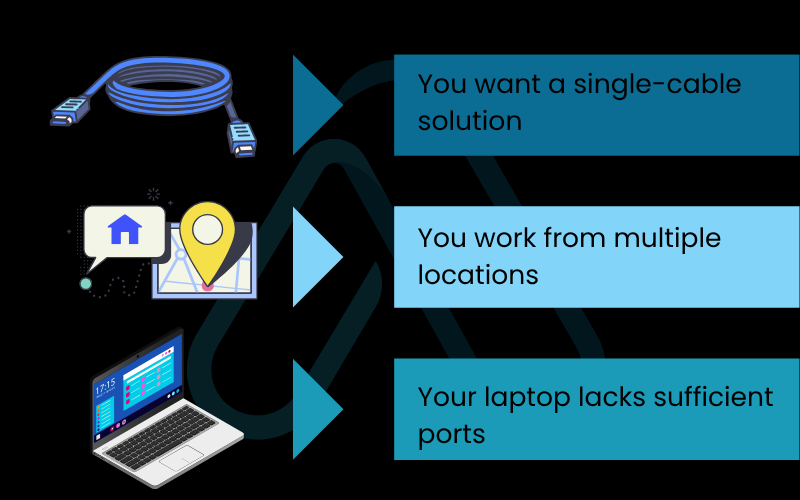
While a simple adapter works, a dock is the superior choice in these scenarios. I advise my clients to invest in a dock if they meet any of these criteria:
- You want a single-cable solution: A modern dock can handle both your monitors, power your laptop, and connect all your peripherals (mouse, keyboard, webcam) through just one USB-C/Thunderbolt cable.
- You work from multiple locations: If you move between a home office and a corporate office, a dock at each location means you just plug in one cable and you’re instantly ready to work.
- Your laptop lacks sufficient ports: For laptops with only one or two USB-C ports, a dock is essential to connect multiple monitors and other devices simultaneously.
3.2. What you need to know between universal vs. proprietary docks
There are two main types of docks. Proprietary docks are made by laptop manufacturers (like Dell, HP, Lenovo) and are designed to work perfectly with their specific business-class models. Universal docks, which use technologies like Thunderbolt or DisplayLink, are designed to work with a wide range of laptop brands. DisplayLink is particularly useful as it uses software to drive displays over a standard USB connection, making it a great workaround for laptops with limited native display support (including those standard M1/M2 MacBooks). A quick pro-tip: always check the dock’s specifications for the maximum resolution and refresh rate it supports across two monitors to avoid disappointment.
| Important Note: Some universal docks, particularly those using DisplayLink technology, require you to install a driver on your laptop. This is usually a simple, one-time process, but it’s something to be aware of to avoid setup confusion. |
4. Software setup for configuring your displays like a PRO
Getting the hardware connected is only half the battle. Now, you need to tell your computer how to use the new screens. This section is the primary answer to the common question, ‘How do I extend my laptop display to two monitors?’. The goal is to create one large, continuous desktop that spans across all three screens (your laptop’s plus the two external ones).
4.1. Extending your desktop in Windows
Configuring your displays in Windows is straightforward. I’ll walk you through the steps to extend display windows correctly.
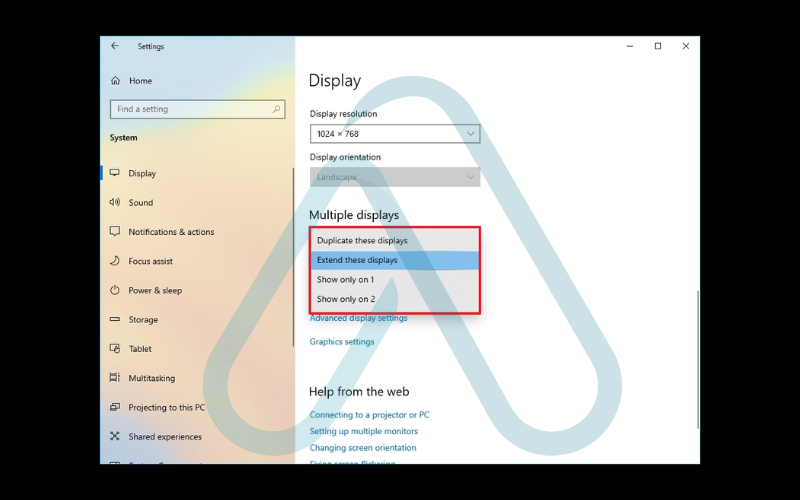
- Right-click on any empty space on your desktop and select ‘Display settings’.
- At the top of the window, you’ll see boxes representing your monitors. Click the ‘Identify’ button, and a number will appear on each screen so you know which is which.
- Click and drag the boxes to rearrange them to match the physical layout of your monitors on your desk. This ensures your mouse moves naturally between them.
- Scroll down to the ‘Multiple displays’ dropdown menu and select ‘Extend these displays’.
- To set your primary monitor (the one with the taskbar and icons), click on its box and then check the ‘Make this my main display’ box below.
4.2. Using Arrangement in macOS
The process is just as simple on a Mac. The settings are located in a slightly different place. Here’s my guide for modern macOS:
- Click the Apple menu in the corner and go to ‘System Settings’.
- Select ‘Displays’ from the sidebar.
- You will see all connected displays represented as icons. If they are showing the same thing, ensure the ‘Mirror Displays’ box is unchecked.
- Click and drag the display icons to match their real-world positions on your desk.
- The display with the white bar at the top is your primary display. You can drag this white bar to any other monitor to change which one is the main screen.
| Expert Tip If you have a standard Apple M1 or M2 MacBook, it will only natively support one external monitor. To connect two and have them extend, you absolutely need a docking station that uses DisplayLink technology.. |
5. Optimizing your setup for specific tasks
Now that you’re set up, here’s how to get the most out of your new dual monitor workspace. The right layout and software can dramatically improve your workflow, and I’ve tailored these tips for different professional needs.
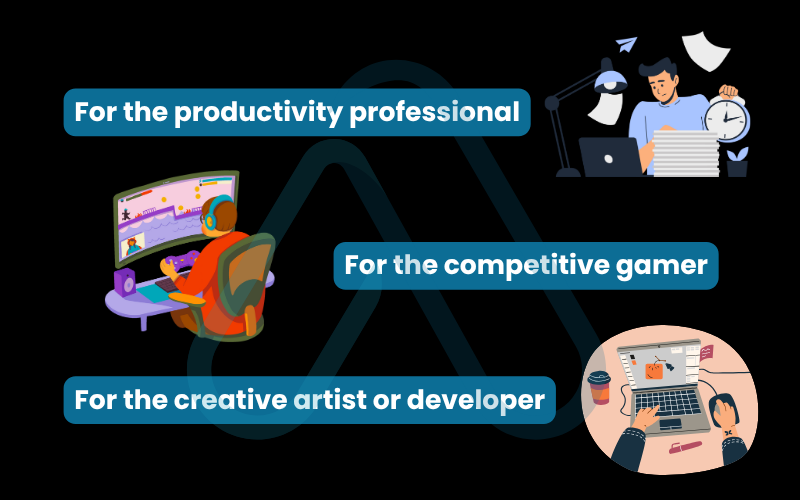
5.1. For the productivity professional
As a remote worker juggling spreadsheets and video calls, an efficient layout is key. Here are some tips I use daily:
- Keep communication apps like Slack and your email client open on one monitor, while your primary work (a document, spreadsheet, or presentation) lives on the main, center monitor.
- Consider turning one of your side monitors vertical (portrait mode). This is incredibly useful for reading long documents, writing code, or browsing long web pages without endless scrolling.
- Use window management tools to stay organized. Windows Snap Assist is built-in and powerful, while an app like Rectangle is a must-have for Mac users to quickly arrange windows with keyboard shortcuts.
5.2. For the competitive gamer
For gaming, a second monitor is your secret weapon for information and community management. Here’s how to optimize it:
- Use your second monitor for non-game applications that you need to monitor, such as Discord, your streaming software like OBS, or a game guide or map.
- Connect your primary gaming monitor to the most powerful video port on your laptop (usually DisplayPort or Thunderbolt) to ensure the best performance.
| Pro Gamer Tip: Running videos or graphically intensive apps on your second monitor can sometimes impact gaming performance on your main screen. If you’re in a competitive match, consider closing unnecessary apps. |
5.3. For the creative artist or developer
Precision and workflow efficiency are everything for creative work. A dual monitor setup is non-negotiable in my opinion. As a developer friend once told me, “Having my code on one screen and the live preview on the other isn’t a luxury; it’s a necessity.” Here’s how to apply that:
- In video editing software like Adobe Premiere, you can put your timeline and tools on one screen and a full-screen video preview on the other.
- For graphic design, ensure you color-calibrate both monitors so that colors look consistent across your entire workspace.
- For developers, the classic setup is your code editor on the main screen and your application’s live preview, terminal, or documentation on the secondary screen.
6. How to fix common dual monitor issues
Even with a perfect setup, you can run into issues. Over the years, I’ve seen it all. Don’t panic; the fix is usually simple. I’ve compiled my knowledge into this troubleshooting matrix. Start with the first solution and work your way down the list.
| Symptom | Potential Cause | Solution(s) to Try (in order) |
|---|---|---|
| Second monitor is not detected at all. | 1. Loose cable. 2. Wrong input source on monitor. 3. OS detection glitch. 4. Outdated graphics driver. 5. Hardware limitation. | 1. Unplug and securely reconnect all cables at both ends. 2. Use the monitor’s physical buttons to open its menu and ensure the input source (e.g., HDMI 1, DisplayPort) matches the cable you’re using. 3. In Windows Display Settings, click the ‘Detect’ button. On Mac, try putting the computer to sleep and waking it up. 4. Visit your laptop manufacturer’s website (or NVIDIA/AMD/Intel) to download and install the latest graphics drivers. 5. If on a standard M1/M2 Mac, remember the one native external monitor limit. You need a DisplayLink dock. |
| Both external displays show the same thing (mirrored). | 1. Incorrect OS setting. 2. Using an HDMI splitter. | 1. This is an easy fix! Go back to your display settings (as detailed in Section 4) and change the mode from ‘Duplicate’ or ‘Mirror’ to ‘Extend’. 2. An HDMI splitter cannot extend displays. You need to replace it with a proper dock or MST hub. |
| Resolution is wrong, or text looks blurry. | 1. Incorrect resolution setting. 2. Scaling issues. 3. Font smoothing setting. | 1. In your display settings, select the problematic monitor and ensure its resolution is set to the ‘Recommended’ or ‘Native’ value. 2. Especially with mixed-resolution monitors (e.g., one 4K, one 1080p), you may need to adjust the ‘Scale’ percentage for each monitor individually until text and icons are a comfortable size. 3. In Windows, search for and run ‘Adjust ClearType text’. In macOS, these settings are largely automatic, but ensuring the native resolution is set is key. |
7. How to avoid damaging your gear
A great setup is a safe setup. In my work, I’ve seen damaged ports and fried components from simple mistakes. Follow these simple rules to protect your investment and ensure your hardware lasts for years.
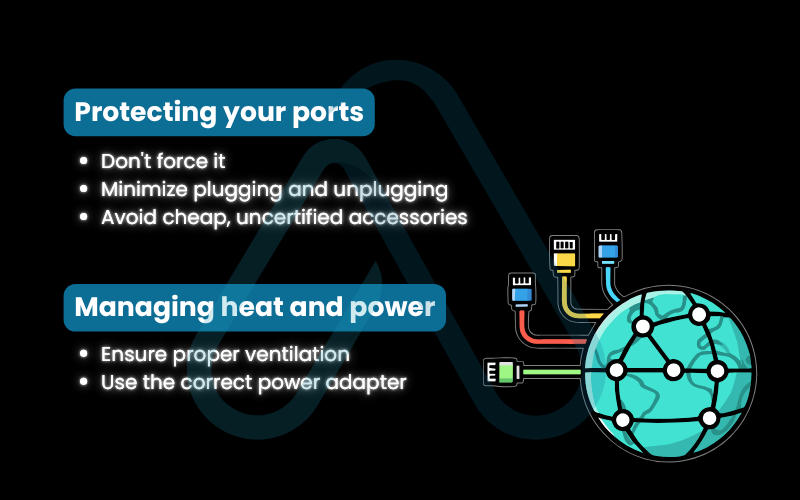
7.1. Protecting your ports
Your laptop’s ports can be a point of failure if not treated with care. Here are my top recommendations:
- Don’t force it: Plugs should slide in smoothly. If you feel resistance, double-check the cable’s orientation. Forcing it can bend or break the delicate pins inside.
- Minimize plugging and unplugging: Your laptop’s ports are like door hinges; they are only rated for so many uses. If you connect and disconnect your setup daily, I strongly recommend using a docking station. This puts the wear and tear on the dock’s more durable cable, not your laptop’s built-in ports.
- Avoid cheap, uncertified accessories: Low-quality cables and adapters can have loose fittings or poor wiring, which can lead to a bad connection or even short-circuit your port. Stick to reputable brands.
7.2. Managing heat and power
Driving two external displays makes your laptop work harder, which generates more heat and uses more power. Keeping this in check is crucial for performance and longevity.
- Ensure proper ventilation: Never block the air vents on your laptop, which are usually on the bottom, sides, or back. Overheating can cause your system to slow down (thermal throttle) and can degrade components over time.
- Use the correct power adapter: Unless you are using a high-quality docking station that provides sufficient power delivery, always use the original power adapter that came with your laptop.
| Critical Warning: Using an underpowered third-party charger while driving two monitors can cause your laptop’s battery to drain even while plugged in and can put stress on the power systems. |
8. FAQs about how to connect 2 monitors to a laptop
Here are quick answers to the most common questions I get about dual monitor setups.
Can I connect two monitors to my laptop using only one HDMI port?
No. One HDMI port can only output one video signal. An HDMI splitter will just mirror the same image on both screens. To extend your display, you’ll need a second video output or a USB-C adapter or docking station.
Do I need a docking station for dual monitors?
Not always, but it’s often the easiest and cleanest option. If your laptop has two video ports (for example, HDMI and Thunderbolt), you can connect directly. Otherwise, a dock adds more ports and simplifies setup.
What if my laptop doesn’t have enough ports for two monitors?
Use a USB-C hub or docking station. If your laptop’s USB-C supports DisplayPort, you can connect multiple screens. If not, a DisplayLink dock can create video output through a regular USB-A 3.0 port.
Why aren’t both of my monitors being detected?
Check that all cables are secure, the correct input source is selected, and your graphics drivers are up to date. Some laptops, especially M1/M2 MacBooks, only support one external display.
Glossary of key terms
| Abbreviation | Full Term | Meaning |
|---|---|---|
| GPU | Graphics Processing Unit | The specialized electronic circuit designed to rapidly manipulate and alter memory to accelerate the creation of images for output to a display device. |
| HDMI | High-Definition Multimedia Interface | A common digital interface for transmitting audio and video data from a source (like a laptop) to a display (like a monitor or TV). |
| DP | DisplayPort | A digital display interface primarily used to connect a video source to a display device. It can support higher resolutions and refresh rates than HDMI. |
| USB-C | Universal Serial Bus Type-C | A versatile, reversible connector standard. It can support data transfer, power delivery, and video output (if it has Thunderbolt or DP Alt Mode capabilities). |
| Thunderbolt | Thunderbolt | A high-speed hardware interface developed by Intel that combines data, video, and power into a single connection, using the USB-C connector type. |
| VGA / DVI | Video Graphics Array / Digital Visual Interface | Older, analog (VGA) and digital (DVI) video connection standards that are now largely replaced by HDMI and DisplayPort. |
| DP Alt Mode | DisplayPort Alternate Mode | A feature of USB-C that allows the port to transmit a native DisplayPort video signal. |
| MST | Multi-Stream Transport | A feature of DisplayPort that allows multiple independent video signals to be transmitted from a single output port. Primarily supported on Windows. |
| DisplayLink | DisplayLink | A technology that uses a combination of software and hardware to send video over a standard USB-A or USB-C connection, useful for laptops with limited native video outputs. |
9. Final thoughts
Setting up a dual monitor system is one of the most impactful upgrades you can make to your workspace. By following this guide, you’ve learned how to confidently assess your hardware, make the right connections, configure your software, and troubleshoot common issues. I’ve used my years of hands-on experience to make this process as clear as possible, turning a potentially technical headache into an achievable weekend project.
Here are the most critical takeaways from this guide:
- Check Compatibility First: Always verify your laptop’s video ports and GPU capabilities before buying any hardware to avoid frustration.
- Choose the Right Connector: A direct connection is best. If that’s not possible, a docking station is a far more reliable and versatile solution than simple splitters or cheap adapters.
- Extend, Don’t Duplicate: The true power of a multi-monitor setup comes from extending your desktop, which is a simple software setting in both Windows and macOS.
- Troubleshoot Methodically: If something goes wrong, start with the simplest solutions first – cables and inputs, before moving on to software and drivers.
Enjoy your new, expansive workspace and the productivity boost that comes with it! Now that your setup is optimized, take your professional growth to the next level. For more in-depth guides, explore our Productivity & Automation categories on Afdevinfo.


