Is your phone flashing that dreaded ‘Storage Almost Full’ notification right when you want to capture a perfect moment? I’ve been there, and it’s a common frustration that makes knowing how to transfer pictures from phone to computer an essential skill in our digital lives. Your phone holds irreplaceable memories, but keeping them locked away on a single, vulnerable device is a risk. This isn’t just another list of methods; it’s my complete problem-solving toolkit, built from over a decade of hands-on experience, designed to help you free your photos, secure your memories, and reclaim your phone’s storage, no matter what device you use.
With this guide, I’ll walk you through everything you need to know. You will be able to:
- Find the fastest and easiest transfer method for your specific needs.
- Solve any frustrating connection error you might encounter.
- Organize your photos on your computer like a seasoned pro.
- Keep your precious memories private and secure from prying eyes.
1. Find your perfect transfer method in 60 seconds
Before we dive into the step-by-step instructions, it’s important to choose the right tool for the job. Your best option depends on how many photos you’re moving, how quickly you need it done, and what devices you’re using. I’ve created this quick comparison table to help you decide in under a minute.
Here is a breakdown of the most common methods to help you choose wisely:
| Method | Best For… | Speed | Ease of Use | Security Level |
| USB Cable | Large batches (1000s of photos), best quality, no internet | Very Fast | Easy | Very High |
| Wireless Apps | Convenience, transferring a few dozen photos without a cable | Fast | Easy | High (on private Wi-Fi) |
| Cloud Storage | Automatic, continuous backup and syncing across all devices | Fast (Sync) | Very Easy (Set & forget) | High (with strong password/2FA) |
| Bluetooth | Transferring 1-5 photos when no other option is available | Very Slow | Moderate | Moderate |
2. Transferring photos with a USB cable
When it comes to speed, security, and reliability for large transfers, nothing beats a direct connection. Using a USB cable is my go-to method for archiving entire photo libraries because it requires no internet connection and ensures your photos are copied without any compression, preserving their original quality. Let’s walk through the process for every major device combination.
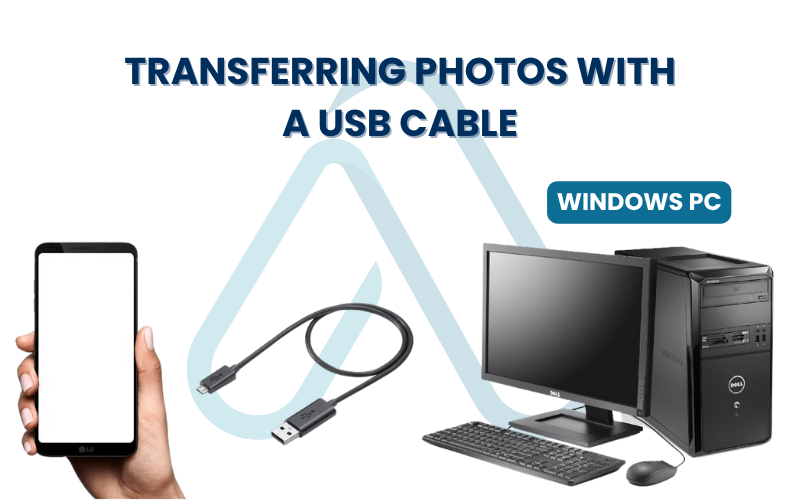
2.1. From an Android phone to a Windows PC
This is one of the most straightforward ways to move images from Android to PC. Windows has native support for Android devices, so you just need to tell your phone what you want to do.
Here are the steps I follow:
- Connect your Android phone to your Windows PC using a USB cable.
- Unlock your phone. A notification will appear regarding the USB connection.
- On your phone, swipe down and tap the USB notification to select ‘File Transfer’ or ‘Transfer photos (PTP)’. This is the most crucial step.
- On your PC, open File Explorer (Windows key + E). Your phone should appear as a new drive under ‘This PC’.
- Double-click your phone’s icon, and navigate to the ‘Internal Storage’ or ‘SD Card’.
- Find the folder named ‘DCIM’ (Digital Camera Images). This is where your photos are stored.
- Simply copy the entire folder or select specific photos and paste them to a folder on your computer.
If your PC doesn’t recognize your phone, try using a different USB port or a different cable, as some cables are for charging only and don’t support data transfer.
2.2. From an iPhone to a Windows PC
While Apple and Microsoft are competitors, they’ve made it relatively easy to copy pictures from an iPhone to a laptop or desktop running Windows. The process involves giving your PC permission to access your photos.
I recommend using the built-in Windows Photos app for an organized import:
- Connect your iPhone to your PC with your Lightning-to-USB cable.
- Unlock your iPhone. A prompt will appear on your screen saying ‘Trust This Computer?’. Tap ‘Trust’. This step is mandatory, and a common point of failure if missed.
- The Windows Photos app may open automatically. If not, open it from the Start Menu.
- Click the ‘Import’ button in the top-right corner and select ‘From a USB device’.
- The app will scan your iPhone for photos and videos. Select the pictures you want to import and click ‘Import Selected’.
Alternatively, you can use File Explorer. After tapping ‘Trust’, your iPhone will appear in ‘This PC’. Navigate to Internal Storage > DCIM, where you’ll find your photos in various folders.
2.3. From an Android phone to a Mac
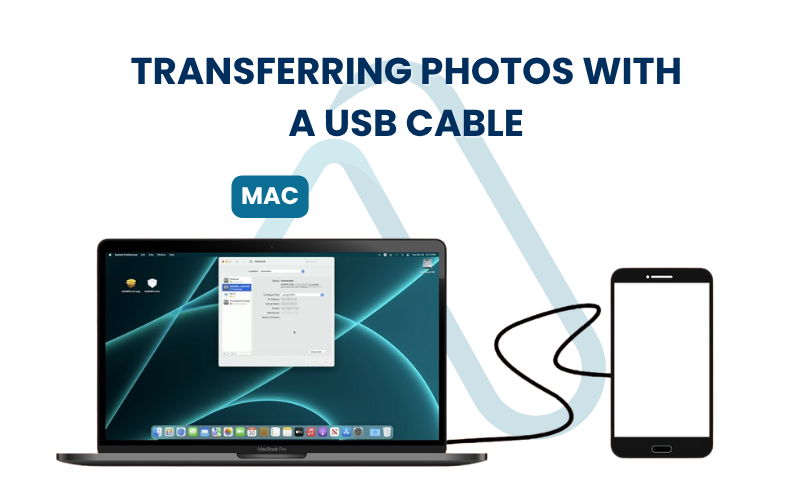
Here’s where things get a bit different. By default, a Mac can’t read an Android phone’s storage directly. To bridge this gap, you’ll need a free and official tool from Google.
Prerequisite: Android File Transfer
Before you begin, you must download and install a free application from Google called Android File Transfer. You can get it directly from the official Android website. Install it once, and it will be ready whenever you need to perform a Mac photo import from your phone.
Once the app is installed, the process is simple:
- Connect your Android phone to your Mac with a USB cable.
- Set your phone’s USB mode to ‘File Transfer’ as described in section 2.1.
- The Android File Transfer application should launch automatically, showing you the contents of your phone’s storage.
- Navigate to the DCIM folder, select the photos you want, and drag them to a folder on your Mac.
2.4. From an iPhone to a Mac
As you’d expect, transferring photos between two Apple devices is incredibly seamless. The native macOS Photos app is designed for this and helps you manage your entire photo library.
Follow these steps to complete a Mac photo import from your phone:
- Connect your iPhone to your Mac with its USB cable.
- Unlock your iPhone. You may need to ‘Trust’ the Mac if it’s your first time connecting.
- The Photos app on your Mac should open automatically to the import screen. If not, open it and select your iPhone from the sidebar.
- You’ll see all the photos and videos on your iPhone. Select the ones you want to import and click ‘Import Selected’. You can also choose ‘Import All New Items’.
- After the import, you’ll be given the option to delete the imported photos from your iPhone, which is a great way to free up space.
For those who prefer a simpler file transfer without adding to a library, Apple provides a built-in utility called ‘Image Capture’.
- Photos App: Best for organizing pictures into a managed library, with albums, editing, and iCloud sync.
- Image Capture: A lightweight tool perfect for quickly dumping photos into a specific folder on your Mac without any library management.
3. Wireless photo transfer methods
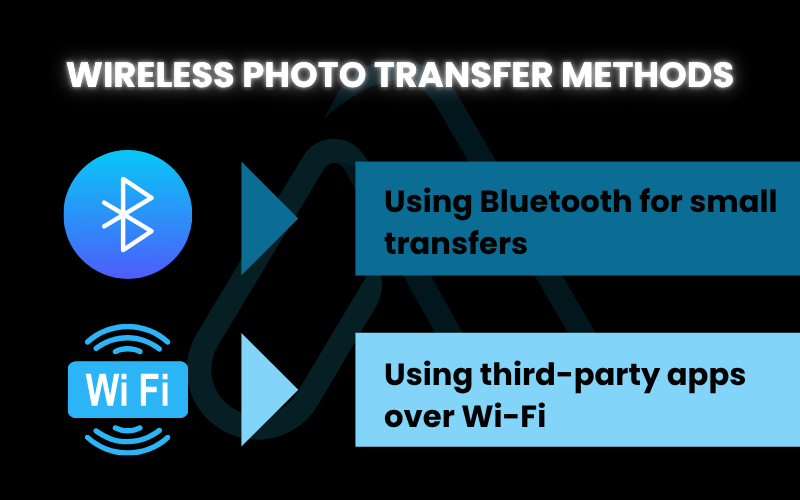
Can’t find your cable or just need to send a few quick shots to your computer? Wireless transfers are a fantastic, convenient alternative. While there are a few different wireless photo transfer methods, they generally fall into two categories: direct device-to-device transfers like Bluetooth, and app-based transfers over your local Wi-Fi network.
3.1. Using Bluetooth for small transfers
Bluetooth is a technology built into nearly every modern device, making it a universal option. However, I must be clear about its limitations: it is extremely slow and not suitable for large files or batches of photos.
| Warning Bluetooth is not recommended for transferring more than 5-10 photos at a time due to its slow speed. Videos will take an exceptionally long time. |
To use it, you first need to pair your devices:
- On both your computer and phone, turn on Bluetooth and make them discoverable.
- On your computer, search for new Bluetooth devices and select your phone to initiate pairing. Confirm the pairing code on both screens.
- Once paired, go to your phone’s gallery, select a photo, tap the ‘Share’ icon, and choose ‘Bluetooth’.
- Select your computer from the list of paired devices to send the file. You’ll need to accept the incoming file on your computer.
3.2. Using third-party apps over Wi-Fi
For a much faster and more robust wireless experience, I strongly recommend using a dedicated app. These apps use your local Wi-Fi network to transfer files at high speeds, and many are cross-platform. This is the best way to transfer photos without using cables for more than just a few images. The only requirement is that both your phone and computer must be connected to the same Wi-Fi network.
Here are a couple of my trusted recommendations:
PhotoSync
- Pros: Extremely feature-rich, supports automatic transfers, can send to computers, cloud services, and NAS drives. Preserves metadata.
- Cons: The free version has limitations; a one-time purchase is required to unlock all features.
Send Anywhere
- Pros: Very simple to use, cross-platform, and free. It works by generating a temporary 6-digit code or QR code for secure, direct transfers.
- Cons: Supported by ads. Less focused on permanent library management and more on one-off transfers.
When using these apps, always download them from the official Apple App Store or Google Play Store, and be mindful of permissions. For maximum security, only perform transfers on a private, password-protected Wi-Fi network.
4. Access your photos from anywhere on Cloud
Think of cloud storage as a secure digital photo album that lives on the internet, accessible with your password from any device you own. This is my favorite ‘set it and forget it’ method. Once configured, your phone will automatically upload new photos to your cloud account whenever you’re on Wi-Fi. This not only transfers them but also serves as a crucial backup. The main players are Google Photos, Apple iCloud, and platform-agnostic options like Dropbox and OneDrive.
4.1. Using Google Photos
Google Photos is an excellent cross-platform solution, making it ideal for Android users and even iPhone users who live in a mixed-device household. It offers smart organization features and powerful search capabilities.
Here is a quick checklist to get started:
- Download the Google Photos app on your Android or iPhone.
- Open the app and sign in with your Google account.
- Tap your profile icon in the top-right, go to ‘Photos settings’ > ‘Backup & sync’, and turn it on.
- Choose your upload quality. ‘Storage saver’ offers great quality at a reduced file size, while ‘Original quality’ uses your Google account storage.
- Once enabled, your photos will begin uploading. You can then access them on any computer by visiting photos.google.com.
- From the website, you can select photos and click the download button to save them directly to your computer.
4.2. Using Apple iCloud Photos
For those invested in the Apple ecosystem, iCloud Photos is the most seamless solution. It’s designed to sync your entire photo library across your iPhone, iPad, and Mac, making every photo available everywhere, all the time.
Keep all your photos and videos in iCloud, so you can get to them from any of your devices.
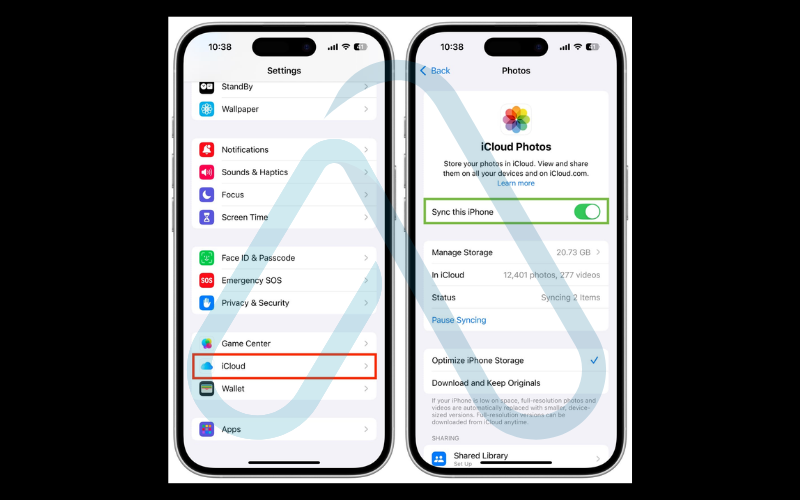
To enable iCloud Photos, it’s a simple toggle on your iPhone:
- Go to Settings > [Your Name] > iCloud > Photos.
- Turn on the switch for ‘iCloud Photos’.
- I recommend selecting ‘Optimize iPhone Storage’ to save space on your device. Your full-resolution photos will be safely stored in iCloud.
On a Mac, your photos will automatically appear in the Photos app. For Windows users, you can access your library by logging into iCloud.com, or you can download the iCloud for Windows app to sync photos directly to a folder on your PC.
5. The power of AirDrop and Finder for Mac users for Mac users
If you’re an Apple user, you have a couple more tricks up your sleeve that are incredibly fast and efficient. Many guides overlook these Mac-specific methods, but in my experience, they are often the best tools for the job. The tight integration within the Apple ecosystem is a major advantage.
5.1. Instant transfers with AirDrop
For sending a handful of photos or even a few dozen from an iPhone to a Mac, AirDrop is king. It’s almost instantaneous and ridiculously easy to use.
Here’s a simple checklist to ensure it works every time:
- On your Mac, open Finder and click ‘AirDrop’ in the sidebar to make sure it’s awake and discoverable. Ensure Wi-Fi and Bluetooth are on.
- On your iPhone, make sure Wi-Fi and Bluetooth are enabled in the Control Center.
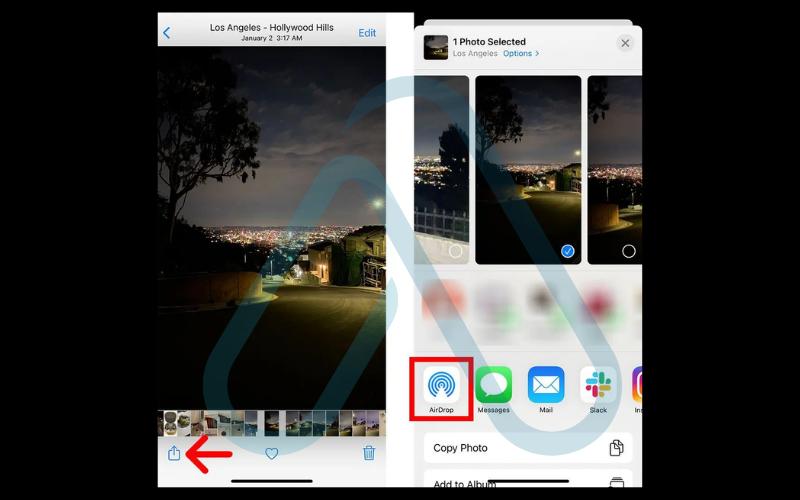
- Open the Photos app on your iPhone and select the pictures you want to send.
- Tap the ‘Share’ icon (the box with an arrow pointing up).
- Tap the ‘AirDrop’ icon and then select your Mac from the list of devices.
- The photos will be sent instantly and will appear in your Mac’s ‘Downloads’ folder.
5.2. Using Finder for wired transfers (macOS Catalina and newer)
If you’ve been using Macs for a while, you might remember using iTunes to manage your phone. That has changed. If you’re using a newer Mac (running macOS Catalina or later), you won’t use iTunes anymore, your iPhone appears directly in Finder for wired transfers and management.
This method provides more control than the Photos app import:
- Connect your iPhone to your Mac with a USB cable.
- Open a Finder window. You will see your iPhone listed in the sidebar under ‘Locations’.
- Click on your iPhone’s name. You may need to ‘Trust’ the computer on your phone.
- Navigate to the ‘Photos’ tab in the Finder window.
- Here, you can choose to sync photos from your Photos library to your iPhone. This interface is more for syncing *to* the phone, but its appearance in Finder confirms the connection for use with Image Capture or the Photos app as described in section 2.4. This is the modern replacement for the old iTunes interface.
6. What to do when transfers fail
Even with the best instructions, technology can be finicky. I’ve spent countless hours helping people with USB photo transfer troubleshooting, and most issues boil down to a few common culprits. Instead of searching endlessly for answers, use my decision-tree guide to diagnose and fix the problem quickly.
Start at the top and work your way down. Here’s what to check if your transfer isn’t working:
Is your computer not seeing the phone at all?
- If YES: First, ensure your phone is unlocked. An iPhone must be unlocked and a ‘Trust’ prompt confirmed. An Android phone must be unlocked and ‘File Transfer’ mode selected from the USB notification.
- If that doesn’t work: Try a different USB cable. Many cheaper cables are for charging only and lack the internal wiring for data transfer. Use the official cable that came with your phone if possible.
- Still nothing? Try a different USB port on your computer. If you’re using a desktop, try one of the ports on the back of the machine, as they are connected directly to the motherboard.
Does the transfer start but then stop midway or fail?
- If YES: This often indicates an unstable connection or a problem with a specific file. Try transferring a smaller batch of photos. If that works, you may have a corrupted photo file in the original batch.
- Another cause: Make sure neither your phone nor your computer goes to sleep during the transfer. Adjust your power settings for long transfers.
Are some photos or folders not showing up for transfer?
- If YES: If you’re using iCloud Photos with ‘Optimize iPhone Storage’ enabled, the full-resolution photo might not be on your device. You’ll need to download it from iCloud first or use the cloud method to access it.
- For Android: Check both ‘Internal Storage’ and the ‘SD Card’ (if you have one) for the DCIM folder. Photos can sometimes be stored in other folders as well, like ‘Pictures’ or ‘Downloads’.
7. Organizing and protecting your photo library
Getting your photos onto your computer is only half the battle. I’ve seen too many people end up with a chaotic ‘Downloads’ folder filled with thousands of unfindable files. The most important step for preserving your memories long-term is creating a system. Let’s make sure you can find and enjoy your photos for years to come.
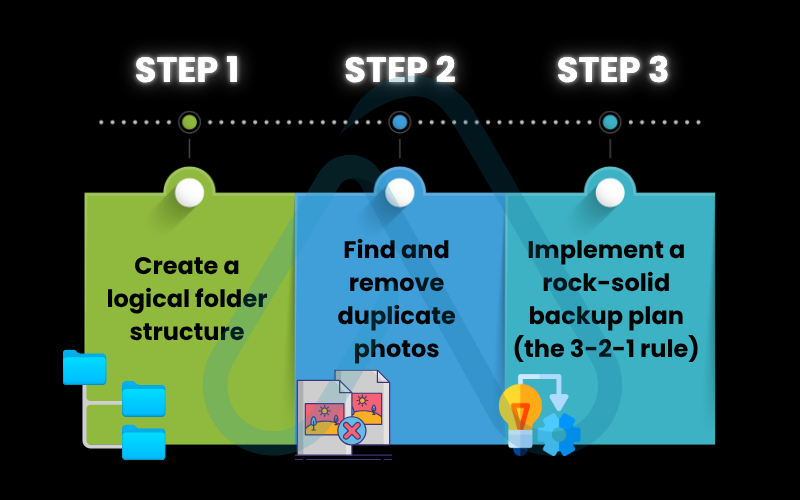
7.1. Create a logical folder structure
Consistency is key. The best system is one you’ll actually use, but I’ve found a simple, date-based structure to be the most scalable and future-proof. It prevents you from having one giant folder with 10,000 files.
I recommend a ‘Year > Month > Event‘ structure. It looks like this:
/Photos/
  /2024/
    /2024-01-New_Years/
    /2024-05-Beach_Trip/
    /2024-09-Annas_Birthday/
This makes it incredibly easy to browse chronologically and find specific events without relying on search.
7.2. Find and remove duplicate photos
Duplicates are an unavoidable nuisance. They happen from re-importing the same photos, cloud sync errors, or saving edited copies. Before you spend time organizing, it’s wise to clean house. Running a duplicate finder can save you gigabytes of space and a lot of headaches.
Here are a couple of reliable tools I’ve used:
| Tool | Platform | Notes |
| Duplicate Cleaner Free | Windows | A powerful free tool with lots of options for finding duplicates by content, not just filename. |
| Gemini 2 | Mac | A paid tool with a beautiful interface that makes finding and deleting duplicates incredibly easy and safe. |
7.3. Implement a rock-solid backup plan (the 3-2-1 rule)
Please hear me on this: a single copy of a photo on one hard drive is not a backup. It’s just a disaster waiting to happen. To truly protect your photos, I live by the professional 3-2-1 backup strategy. It’s simple and effective.
The rule means you should have:
- 3 copies of your data.
- On 2 different types of media (e.g., your computer’s internal drive and an external hard drive).
- With 1 copy located off-site (e.g., in the cloud or another physical location).
A practical example for your photo library would be: The photos on your computer (Copy 1), a nightly backup to an external USB hard drive (Copy 2, different media), and a sync to a cloud backup service like Backblaze or iDrive (Copy 3, off-site).
8. Tailored solutions for specific needs
Not everyone’s photo management needs are the same. A parent archiving family photos has different priorities than a small business owner managing project images. Based on my experience, here are some tailored recommendations for different scenarios.
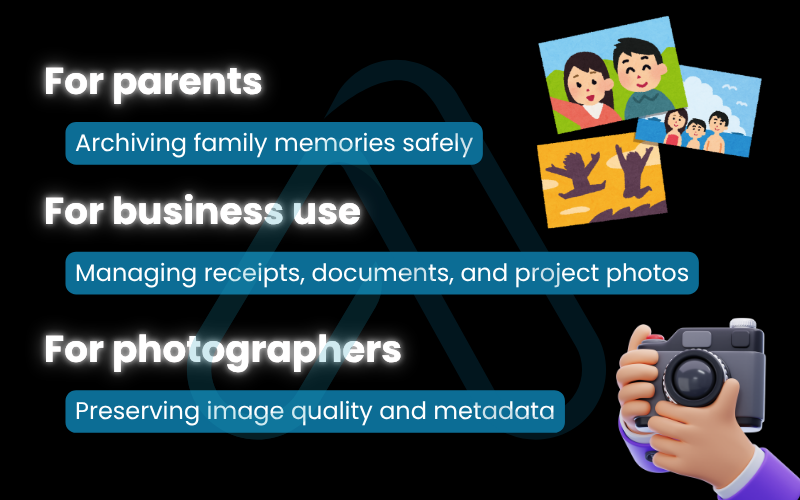
8.1. Archiving family memories safely for parents
Your child’s first steps are irreplaceable. For parents, the focus should be on ease of use, automation, and sharing. I strongly recommend an automated cloud backup solution like Google Photos or iCloud. This ensures that every photo you take is backed up without you having to think about it. Furthermore, features like ‘Shared Albums’ are perfect for easily and privately sharing the latest pictures with grandparents and other family members without flooding social media.
8.2. Managing receipts, documents, and project photos for business use
When managing images for a business, organization and security are paramount. I suggest using a business-grade cloud solution like OneDrive for Business or Google Workspace. These services offer better security controls, team access management, and larger storage pools. Adopting a strict file naming convention (e.g., `YYYY-MM-DD_ProjectName_Item.jpg`) is crucial for easy searching and compliance, ensuring you can find that specific receipt or project photo months later.
8.3. Preserving image quality and metadata for photographers
For amateur and professional photographers, image quality is everything. I always recommend using the wired USB transfer method, as it guarantees a bit-for-bit copy of the original file, preserving all the rich EXIF data (camera settings, location, etc.). Avoid methods like Bluetooth or some messaging apps that can compress images and strip this valuable metadata. If your phone shoots in RAW format, a USB transfer is the only reliable way to move these large, high-quality files without alteration.
9. Security best practices for photo transfers
Your photos contain a wealth of personal information, from your location to the faces of your loved ones. It’s crucial to handle them with care. While all the methods I’ve discussed are generally safe, your security often depends on your own practices. Follow these simple steps to keep your memories private.
Here is my essential security checklist:
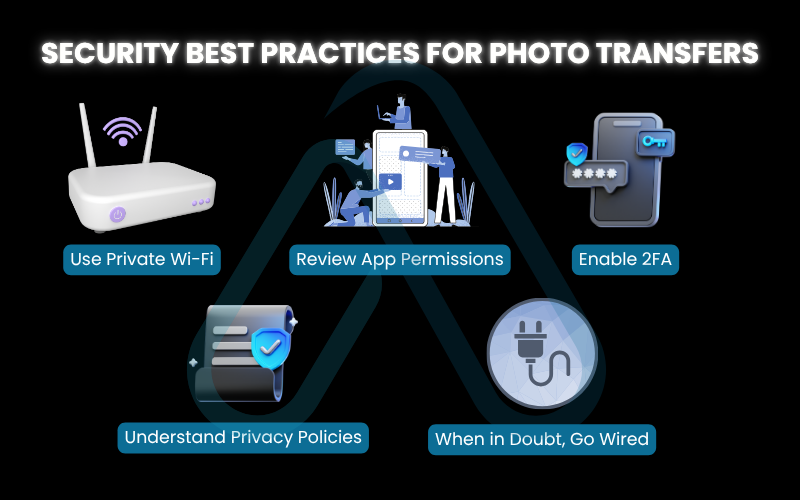
- Use Private Wi-Fi: Never transfer photos over public Wi-Fi networks (like at a cafe or airport). Other users on the network could potentially intercept your data. Always use your private, password-protected home or office network.
- Review App Permissions: Before installing any third-party transfer app, review the permissions it asks for. Does it really need access to your contacts or microphone? If it seems excessive, find another app.
- Enable Two-Factor Authentication (2FA): For any cloud service you use (iCloud, Google Photos, Dropbox), enable 2FA. This adds a critical layer of security, requiring a code from your phone in addition to your password, making it much harder for unauthorized users to access your account.
- Understand Privacy Policies: Take a few minutes to understand how your chosen cloud service handles your data. Do they scan your photos for advertising purposes? Knowing their policies helps you make an informed decision.
- When in Doubt, Go Wired: For maximum privacy and security, a direct USB transfer from your phone to your computer is the gold standard. Since the data never travels over a network, it’s the most secure method available.
10. FAQs about how to transfer pictures from phone to computer safely
After years of writing tutorials, I’ve found that users often have the same key questions. Here are quick and direct answers to the most common ones I hear.
What is the fastest way to transfer pictures from phone to computer?
It depends on the context. For large batches (hundreds or thousands of photos), a wired USB 3.0+ connection is the undisputed speed champion. For convenience and transferring a handful of photos between Apple devices, AirDrop is nearly instant. For an ongoing, automated process, a background cloud sync is the most effortless and ‘feels’ fast because it happens on its own.
How do I fix connection issues when transferring photos via USB?
First, check the basics: Is your phone unlocked? Have you used a proper data cable (not a charge-only one)? For Android, ensure you’ve selected ‘File Transfer’ (MTP) mode from the USB notification. For iPhone, make sure you’ve tapped ‘Trust’ on the ‘Trust This Computer’ prompt. For more help, refer to the full troubleshooting flowchart in this guide.
Can I transfer photos without using cables or Internet?
Yes. Bluetooth is one option, but it’s extremely slow and only practical for 1-2 photos. Some third-party apps can also create a direct Wi-Fi connection (Wi-Fi Direct) between your phone and computer, which doesn’t require a router or an active internet connection, only a local Wi-Fi link between the two devices.
How do I keep my photos organized after transferring?
The key is to be systematic. I recommend three steps: first, create a simple folder structure like ‘Year > Month > Event’ to keep photos sorted chronologically. Second, use a duplicate finder tool to remove clutter. Finally, set up a 3-2-1 backup plan to ensure your organized library is safe. You can find detailed steps in the organization section.
Is it safe to use photo transfer apps or cloud services?
Generally, yes, provided you take precautions. Stick to reputable, well-reviewed services from official app stores. Always use a strong, unique password for your account and enable two-factor authentication (2FA). For maximum privacy, a direct USB transfer remains the safest method as your data never travels over a network.
Glossary of key terms
| Abbreviation | Full Term | Meaning |
| MTP | Media Transfer Protocol | A standard protocol that allows a computer to access files on a portable device like an Android phone. |
| PTP | Picture Transfer Protocol | A more limited protocol, often used by digital cameras, for transferring images only. |
| DCIM | Digital Camera Images | The standard name for the folder where digital cameras and smartphones store photos and videos. |
| EXIF | Exchangeable Image File Format | Metadata embedded within an image file that includes details like camera model, settings (shutter speed, aperture), date, and sometimes GPS location. |
| RAW | RAW Image Format | A minimally processed image file format that contains the direct data from the camera sensor, allowing for greater editing flexibility. |
| 2FA | Two-Factor Authentication | A security measure that requires two forms of identification (e.g., a password and a code sent to your phone) to log in to an account. |
| Cloud Storage | – | A service that stores data on remote servers accessed via the internet, allowing you to sync and access files from multiple devices. |
| AirDrop | – | Apple’s proprietary technology for transferring files wirelessly between its devices over short distances using Bluetooth and Wi-Fi. |
11. Final thoughts
Transferring photos from your phone to your computer can feel like a daunting task, but as I’ve shown, there is a perfect, safe method for every user and every situation. Whether you prioritize the raw speed of a USB cable, the convenience of a wireless app, or the automated security of a cloud backup, you now have the knowledge to take control.
By moving beyond the simple transfer and embracing organization and backup strategies, you’re not just clearing storage. You’re actively preserving your digital life for the future.
- Choose Your Method: Start by identifying the best transfer method for your needs using the quick comparison table.
- Follow the Steps: Use the detailed, step-by-step guides for your specific phone and computer combination.
- Troubleshoot with Confidence: If you hit a snag, use the troubleshooting flowchart to quickly diagnose and solve the problem.
- Organize and Protect: The most crucial step is to organize your photos and implement a 3-2-1 backup plan to keep them safe forever.
Now you have all the tools you need to free up your phone’s storage and ensure your precious memories are safe, organized, and accessible for years to come. For more in-depth guides to master your digital world, explore our Productivity & Automation categories on Afdevinfo.


