Knowing how to install Windows 11 on new PC can feel like the final, daunting step after carefully picking out all your components. I’ve been building computers for over a decade, and I can tell you from experience that a smooth operating system installation sets the stage for a stable, high-performance machine.
The good news is that nearly 90% of installation problems can be completely avoided with the right preparation. I’ve designed this guide to be your error-proof resource, walking you through every single step from pre-flight checks to your first boot, ensuring you get it right the first time.
There are some quick answers for you:
- Preparation: Need 8GB+ USB and another PC. (Note: USB will be erased).
- BIOS settings: Enable Secure Boot, enable TPM 2.0 (or PTT/fTPM), select USB as boot priority number 1.
- Create USB: Use the official “Media Creation Tool” from the Microsoft website.
- Important installation step: Always select “Custom: Install Windows only”.
- Select drive: Select the “Unallocated Space” drive and click “Next”.
1. The essential pre-installation checklist
As I always say, an hour of preparation can save you five hours of troubleshooting. Before we even think about creating the installation media, we need to get our ducks in a row. This initial phase is all about making sure you have the tools, your hardware is ready, and your system’s foundational settings are correct.
- Gathering Your Materials: Having everything you need on hand before you start.
- Hardware Requirement Check: Confirming your new build meets Microsoft’s standards.
- BIOS/UEFI Configuration: Setting up the motherboard to accept the new OS securely.
1.1. Gathering your required materials
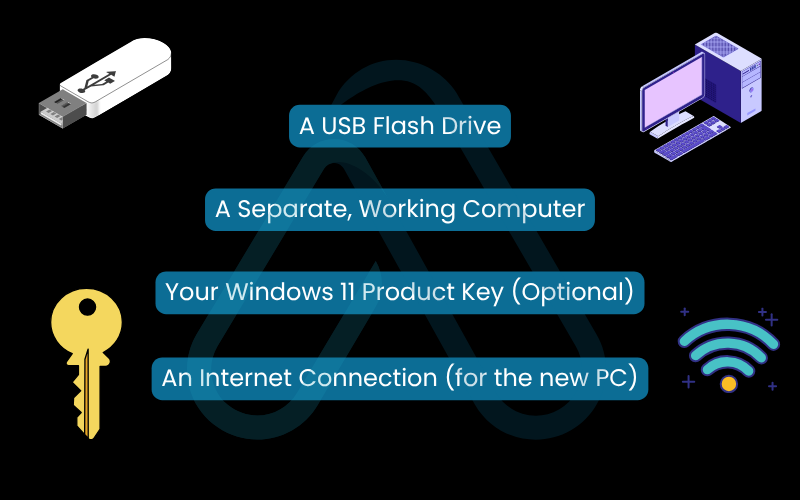
To get started, you’ll need a few key items. I recommend laying these out on your workspace to ensure a smooth process. Here is your complete checklist:
- A USB Flash Drive: This needs to be at least 8GB in size, though a 16GB or 32GB drive is a safe bet. This will become your bootable Windows 11 installation media. A faster USB 3.0 drive will speed up the process.
- A Separate, Working Computer: You need access to another PC with an internet connection to download the Windows 11 Media Creation Tool and create the bootable USB drive.
- Your Windows 11 Product Key (Optional): If you’ve purchased a retail copy of Windows 11, have the 25-character product key ready. If your license is digital, you can activate it later. For a new build, you’ll likely need to purchase one.
- An Internet Connection (for the new PC): While not strictly required for the initial install, you’ll need it during the final setup phase (OOBE) and for downloading critical updates and drivers immediately after.
| Important The process of creating the installation media will completely erase all data on your USB flash drive. Make sure you’ve backed up any important files from it before proceeding. |
1.2. Verifying your new PC meets the hardware requirements
One of the biggest changes with Windows 11 was the introduction of stricter hardware requirements, primarily for security reasons. For a new PC build, meeting these should be straightforward, but it’s crucial to verify. Below are the official minimum requirements from Microsoft:
| Component | Minimum Requirement |
| Processor (CPU) | 1 gigahertz (GHz) or faster with 2 or more cores on a compatible 64-bit processor or System on a Chip (SoC). |
| Memory (RAM) | 4 gigabytes (GB) or greater. |
| Storage | 64 GB or greater available storage. An SSD is highly recommended for performance. |
| System Firmware | UEFI, Secure Boot capable. |
| TPM | Trusted Platform Module (TPM) version 2.0. |
| Graphics Card | Compatible with DirectX 12 or later with a WDDM 2.0 driver. |
| Display | High definition (720p) display, 9-inch or greater monitor, 8 bits per color channel. |
The two key items here are the **TPM 2.0 requirement** and Secure Boot. TPM, or Trusted Platform Module, is a dedicated security chip on your motherboard that provides hardware-based security functions. It’s essential for features like BitLocker encryption and Windows Hello. Microsoft made this mandatory to create a more secure computing baseline against modern threats like rootkits and ransomware, which is a move I strongly support for user safety.
1.3. Configuring your BIOS/UEFI settings
Before you can install Windows, you must tell your new computer’s motherboard how to behave. This is done in the BIOS or, on modern systems, the UEFI. This is probably the most intimidating part for beginners, but I’ll guide you through the safe path. To start, you need to enter the BIOS/UEFI setup. You do this by repeatedly pressing a specific key right after you turn on your PC. Common keys are Del, F2, F10, or F12. This key is usually displayed on the initial boot screen, but if you miss it, check your motherboard’s manual.
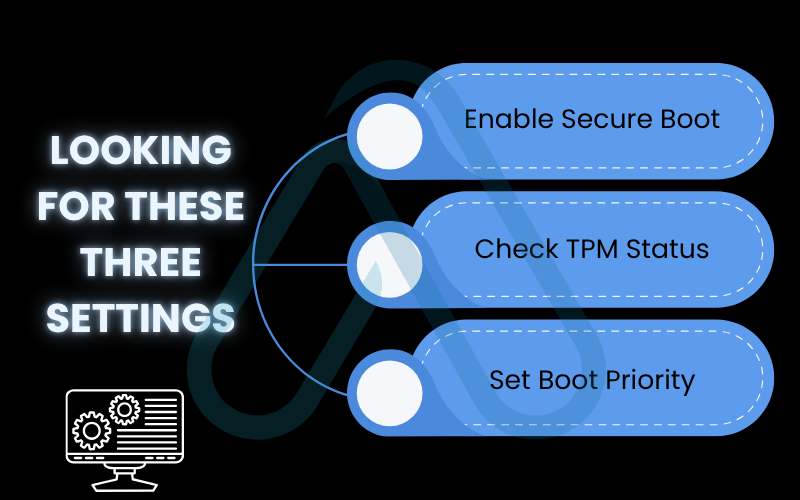
Once inside, every BIOS looks a little different, but you’re looking for these three settings:
- Enable Secure Boot: Look for a ‘Boot’ or ‘Security’ tab. Secure Boot is a feature that ensures your PC only boots software that is trusted by the manufacturer. It’s a critical security layer. Find the ‘Secure Boot’ option and make sure it is set to ‘Enabled’.
- Check TPM Status: In a ‘Security’ or ‘Advanced’ tab, look for an option related to ‘TPM’, ‘Intel PTT’ (for Intel CPUs), or ‘AMD fTPM’ (for AMD CPUs). You just need to ensure this is enabled. On most new motherboards, it will be enabled by default.
- Set Boot Priority: Go to the ‘Boot’ or ‘Boot Priority’ section. You need to tell the computer to boot from your USB drive first, instead of the empty SSD or hard drive. You can usually do this by dragging the USB drive to the top of the list or using the ‘+’ and ‘-‘ keys to change the order. Make sure the USB drive is listed as the #1 boot device.
| Warning Be very careful inside the BIOS/UEFI. Changing the wrong settings, like voltages or clock speeds, can cause system instability or prevent your PC from booting. Stick only to the settings I’ve mentioned, then ‘Save Changes and Exit’. |
2. Creating your bootable Windows 11 USB drive
With our preparation complete, it’s time for our first active step: creating the tool that will install Windows 11 on your new machine. This process involves using another computer to download a special tool from Microsoft that will turn your ordinary USB flash drive into a bootable installer.
2.1. Downloading the official Media Creation Tool
First, you need to download the official tool directly from Microsoft. I cannot stress this enough: always use the official source. Downloading a Windows ISO file from a third-party website is a huge security risk and a common way for malware to get bundled into the operating system before it’s even installed. The official Media Creation Tool is safe, reliable, and guarantees you have a clean, untampered version of Windows.
Download Windows 11 Media Creation Tool
2.2. A step-by-step guide to making the installation media
Once you’ve downloaded the tool, plug in your 8GB+ USB drive and run the program. It will guide you through a series of simple steps. Here’s what you need to do on each screen:
- Accept License Terms: Read and accept the software license terms.
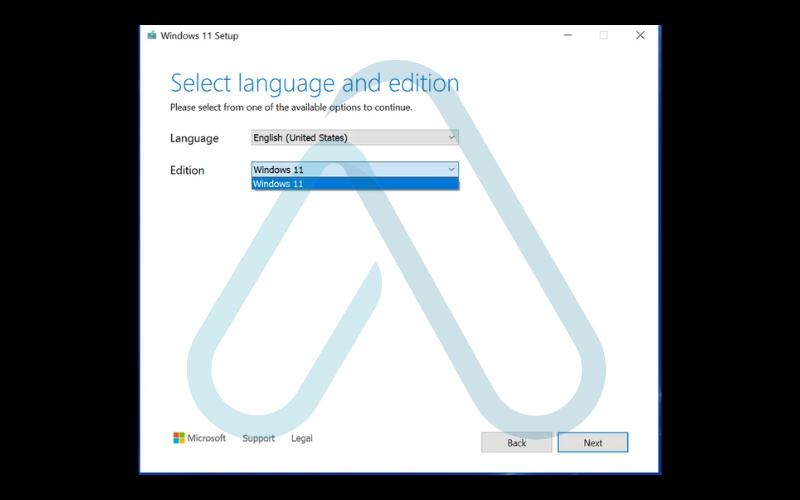
- Select Language and Edition: The tool will usually pre-select the recommended options for the PC you’re using. You can uncheck ‘Use the recommended options for this PC’ if you need to select a different language. Click ‘Next’.
3. Choose Which Media to Use: You’ll be given two options: ‘USB flash drive’ or ‘ISO file’. Select ‘USB flash drive’ and click ‘Next’.
4. Select USB Flash Drive: The tool will show a list of removable drives connected to your PC. Select your USB drive from the list. Remember, as I mentioned before, this drive will be completely erased. Double-check you’ve selected the correct one and click ‘Next’.
5. Wait for the Process to Complete: The tool will now download the latest Windows 11 files and write them to your USB drive. This can take anywhere from 15 to 45 minutes, depending on your internet speed and the speed of the USB drive. Once it’s finished, your Windows 11 USB installation media is ready to use.
3. The complete guide to a clean Windows 11 installation
This is the main event. Now that you have your bootable USB drive and your new PC’s BIOS is correctly configured, you’re ready to perform a Windows 11 clean install. This process will install a fresh, untouched copy of the operating system onto your new storage drive. Take the USB drive from the first computer, plug it into one of the USB ports on your new PC, and turn it on.
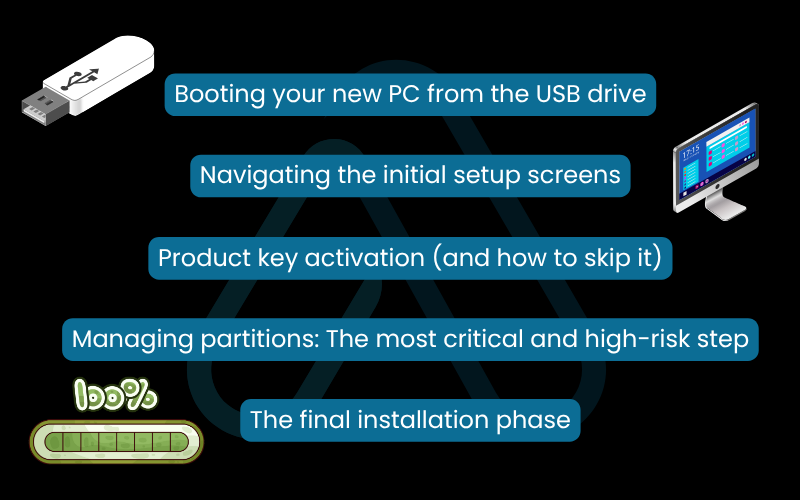
3.1. Booting your new PC from the USB drive
If you set the boot order correctly in Section 1.3, your new PC should automatically boot from the USB drive. You’ll know it’s working when you see the blue Windows logo or a spinning circle of dots on the screen shortly after powering on. The installer is now loading its files into memory.
| Troubleshooting Tip: If your PC boots directly back into the BIOS/UEFI screen or shows an error like ‘No bootable device found’, it means it didn’t detect the USB drive. First, power off the PC and try a different USB port. If that doesn’t work, go back into your BIOS and double-check that the USB drive is set as the #1 boot device. |
3.2. Navigating the initial setup screens
Once the installer loads, you’ll be greeted with the first few setup screens. These are very straightforward. You will need to select your preferences for the following:
- Language to install
- Time and currency format
- Keyboard or input method
Make your selections and click ‘Next’. On the following screen, click the ‘Install now’ button to begin.
3.3. Product key activation (and how to skip it)
The next screen will ask you to activate Windows by entering your 25-character product key. If you have it, you can enter it now. However, for a new build, it’s very common to handle activation after the installation is complete. Simply click the ‘I don’t have a product key’ link at the bottom. This doesn’t stop the installation; it just means you’ll need to activate Windows later from the Settings menu once you’re online. This also helps avoid any potential windows activation issues during the setup process.
3.4. The most critical and high-risk step
This is the one step where you need to pay close attention. You’ll be asked which type of installation you want. Always choose ‘Custom: Install Windows only (advanced)‘. The ‘Upgrade’ option is for existing Windows installations, which you don’t have on a new PC.
The next screen shows your storage drives. Since this is a brand-new PC with a new SSD or hard drive, you should see one drive listed as ‘Drive 0 Unallocated Space’. This is perfect. It means the drive is empty and ready for Windows.
| Warning This is the only step where data loss can occur. On a brand-new PC, your drive should show as ‘Unallocated Space’. If you see existing partitions listed, you may have plugged in a used drive. Do not delete partitions unless you are 100% certain the drive contains no important data. |
To proceed, simply select ‘Drive 0 Unallocated Space’ and click ‘Next’. You do not need to click ‘New’ or ‘Format’. Windows is smart enough to handle everything. It will automatically create several small partitions for recovery tools and system files, then create the main partition (your C: drive) where the OS will be installed. I see many users get confused here, but letting Windows manage the partitioning automatically is the safest and most reliable method.
3.5. The final installation phase
After you’ve selected the drive, the main installation begins. You’ll see a screen titled ‘Installing Windows’ with a list of tasks and a progress percentage. This is where the installer copies all the necessary files from the USB drive to your SSD, installs features, and prepares the system for its first boot. This is essentially a waiting game.
Your PC will restart automatically at least once during this process. This is completely normal. Do not turn off your PC, even if a certain percentage seems to be stuck for a few minutes. Just let it run its course.
4. Setting up your new Windows 11 environment (OOBE)
Once the file installation is complete, your PC will restart one last time and boot into the Windows 11 Out-of-Box Experience, or OOBE. This is a guided setup where you’ll configure your personal settings, connect to a network, and create your user account. Instead of just clicking ‘Next’ through all the defaults, I’m going to show you how to take control of your installation, with a special focus on privacy.
4.1. How to install Windows 11 without a Microsoft account
One of the most common questions I get is, “Can I install Windows 11 without a Microsoft account?” Yes, you absolutely can, and doing so gives you more control over your local machine. Microsoft heavily pushes you to sign in with a Microsoft account, but there is a reliable workaround. This method allows for an offline Windows 11 install of your user profile.
When you get to the ‘Let’s add your Microsoft account’ screen, do the following:
- In the email sign-in box, type the email address: no@thankyou.com.
- Click ‘Next’.
- On the next screen, type anything into the password box (e.g., ‘a’).
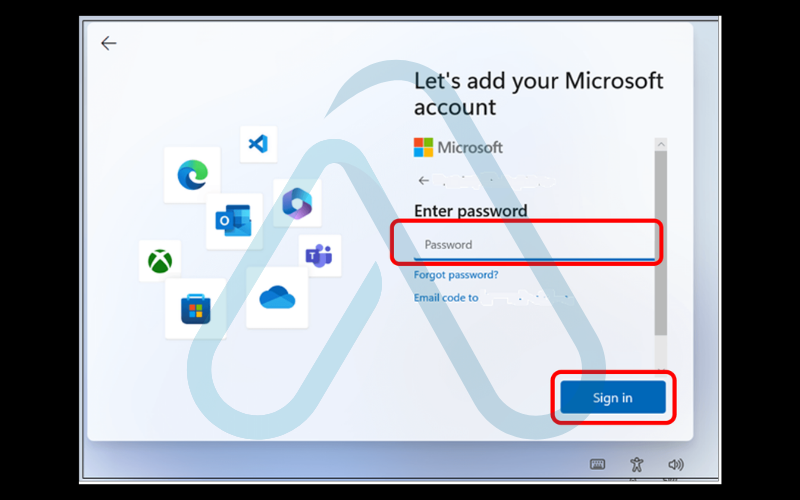
4. Click ‘Sign in’.
5. You will see an ‘Oops, something went wrong’ screen. This is expected. Click ‘Next’.
6. The installer will now let you create a local account. Enter the username you want for your PC, and on the next screen, you can set a password or leave it blank to have no password.
Using a local account means your settings don’t sync across devices via the cloud, and you’ll need separate logins for Microsoft services like the Store or Xbox. However, it prevents Microsoft from linking your PC’s activity directly to your personal online account, which many privacy-conscious users prefer.
4.2. Configuring your privacy settings
Towards the end of the OOBE, you’ll reach the ‘Choose privacy settings for your device’ screen. This is your chance to limit the amount of data your PC sends back to Microsoft. By default, everything is turned on. For maximum privacy, I recommend turning most of these off. Here are my recommendations:
- Location: Recommended: Off. You can always grant location access to specific apps like Maps later if needed.
- Find my device: Recommended: Off, unless you are using a laptop that you frequently travel with.
- Diagnostic data: You must send ‘Required’ data, but you can and should select ‘Required only‘, not ‘Optional’.
- Inking & typing: Recommended: Off. This stops Microsoft from collecting data to improve its handwriting and typing recognition.
- Tailored experiences: Recommended: Off. This uses your diagnostic data to give you personalized ads and tips.
- Advertising ID: Recommended: Off. This prevents apps from showing you personalized ads based on your activity.
Once you’ve made your choices, click ‘Accept’. Windows will then finalize your settings and, after a few moments, you’ll see your brand-new desktop for the first time.
4.3. Essential post-install tasks
Congratulations, you’ve reached the desktop! But you’re not quite done yet. To ensure your new PC is stable, secure, and performing at its best, there are three crucial tasks you should perform immediately. Here is your final checklist:
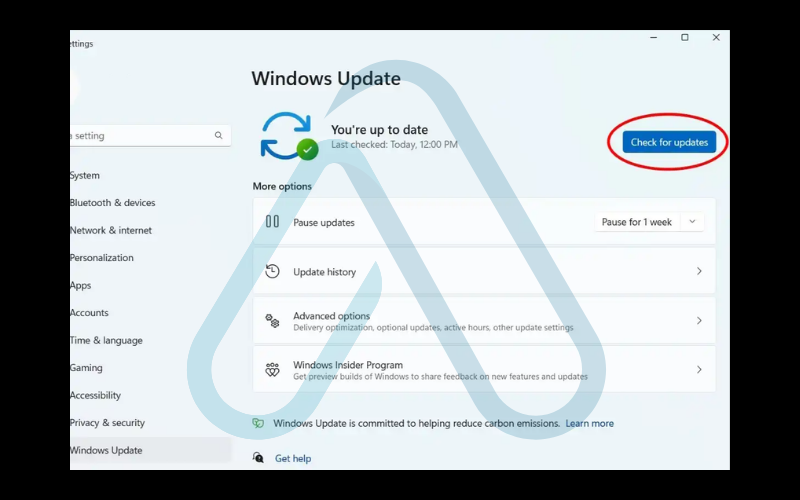
1. Check for Windows Updates: Click Start, go to Settings > Windows Update, and click ‘Check for updates’. Download and install everything it finds. This will install important security patches and generic hardware drivers. You may need to restart several times.
2. Install Your Graphics Card Drivers: This is the most important driver for performance, especially for gaming or content creation. Windows Update often installs a basic, outdated version. I strongly advise you go directly to the manufacturer’s website (NVIDIA, AMD, or Intel) and download the latest driver for your specific graphics card model.
3. Activate Windows: If you skipped entering your product key earlier, now is the time to activate. Go to Settings > System > Activation. Click ‘Change product key’ and enter your 25-character key.
5. Common installation problems and fixes
Even with perfect preparation, sometimes things go wrong. Don’t panic. In my years of experience, I’ve found that most installation errors are common and have a known solution. I’ve compiled the three most frequent issues you might encounter and how to solve them.
5.1. How to fix the ‘This PC can’t run Windows 11’ error
If you see this error right after booting from the USB, it’s almost guaranteed to be a BIOS/UEFI issue. The installer has checked your hardware and found that either Secure Boot or TPM 2.0 is not enabled. The solution is to restart your computer and go back into the BIOS settings. Carefully re-read my instructions in section 1.3. Let’s double-check those critical BIOS settings: find the ‘Secure Boot’ option and ensure it’s ‘Enabled’, then verify that the TPM setting (often called ‘Intel PTT’ or ‘AMD fTPM’) is also ‘Enabled’. Save and exit, and the installation should now proceed.
5.2. How to fix ‘No drives were found’ during installation
This is a frustrating error that can happen when you reach the partition screen (section 3.4) and it’s completely blank. It means Windows doesn’t have the built-in driver for your motherboard’s storage controller, which is common with very new high-end motherboards, particularly those with Intel Rapid Storage Technology (RST). Here is how I fix this:
- On your other working PC, go to your motherboard manufacturer’s support website and find the downloads/drivers page for your specific model.
- Look for ‘Intel Rapid Storage Technology (IRST) Driver’ or a similar SATA/NVMe driver. Download it.
- The file will likely be a .zip file. Extract it onto a second, separate USB drive (not your Windows installer drive).
- Back on your new PC, at the ‘No drives were found’ screen, click the ‘Load driver’ link at the bottom.
- Browse to the second USB drive, find the folder with the drivers you just extracted (it will contain .inf files), and click OK.
- Windows will load the driver, and your storage drive should now appear, allowing you to continue the installation.
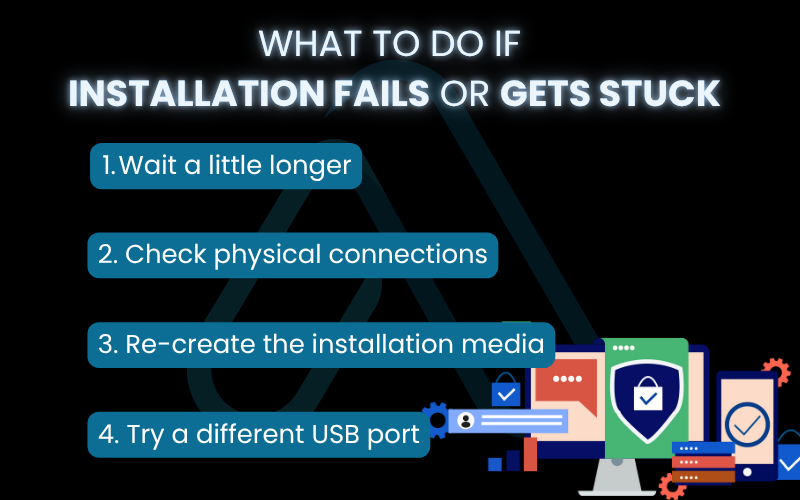
5.3. What to do if installation fails or gets stuck
What if the installation progress bar gets stuck at a certain percentage for over an hour, or you get a generic error message? This can be caused by a few things. I recommend following these steps in order:
- Wait a little longer: Sometimes, certain steps can take up to 30-45 minutes. Give it at least an hour before you assume it’s stuck.
- Check physical connections: If it fails repeatedly, power down the PC. Open the case and double-check that your SSD/hard drive’s power and data cables are securely plugged in.
- Re-create the installation media: The most common cause of a failed installation is a corrupted download or a faulty USB drive. Go back to your other PC, re-run the Media Creation Tool, and create the bootable USB drive again. Using a different physical USB stick is a great troubleshooting step if you have one.
- Try a different USB port: Sometimes a specific USB port can be problematic. Try plugging the installer USB into a different port on your new PC, especially one directly on the motherboard’s rear I/O panel.
6. FAQs about how to install Windows 11 on new PC
After years of writing tutorials, I’ve found that users often have the same key questions. Here are quick and direct answers to the most common ones I hear.
Can I install Windows 11 on an old PC that doesn’t meet the requirements?
Yes, but only through unsupported workarounds. It isn’t recommended because it can cause instability and block security updates.
How long does a clean install of Windows 11 take?
About 20–45 minutes, depending on internet speed and whether you’re installing on SSD or HDD.
Do I need to be connected to the internet to install Windows 11?
You don’t need internet for the file-copy phase, but Windows 11 Home requires internet during setup, and you’ll need it after installation for updates and drivers.
Glossary of key terms
| Abbreviation | Full Term | Meaning |
| BIOS/UEFI | Basic Input/Output System / Unified Extensible Firmware Interface | The low-level software that runs when you first turn on your PC, used to configure hardware settings before the operating system loads. UEFI is the modern replacement for the older BIOS system. |
| TPM | Trusted Platform Module | A dedicated microchip on a computer’s motherboard designed to secure hardware through integrated cryptographic keys. TPM 2.0 is a requirement for Windows 11. |
| Secure Boot | N/A | A security standard developed by the PC industry to make sure that a device boots using only software that is trusted by the Original Equipment Manufacturer (OEM). |
| OS | Operating System | The core software that manages all the hardware and software resources of a computer and provides common services for computer programs. Windows 11 is an example. |
| SSD | Solid-State Drive | A type of storage device that uses flash-based memory, which is much faster than a traditional mechanical hard disk. |
| OOBE | Out-of-Box Experience | The guided setup process a user goes through when they first turn on a new computer or after installing a new operating system. |
7. Final thoughts
I hope this detailed walkthrough has shown you that a clean Windows 11 installation on a new PC is a very manageable process. By focusing on careful preparation and understanding the critical decision points, you can avoid common pitfalls and ensure your new machine starts its life on a solid, stable, and secure foundation. You’ve built the hardware; now you’ve given it the perfect software base to perform its best.
Here are the most critical takeaways I want you to remember:
- Preparation is everything. Verifying hardware requirements and configuring your BIOS/UEFI settings correctly beforehand is the key to preventing 90% of installation errors.
- Always use the official Media Creation Tool. This guarantees you have a clean, safe, and up-to-date copy of Windows, free from potential malware.
- The partition step is the most critical. On a new PC, simply select the ‘Unallocated Space’ and let Windows handle the rest automatically for a risk-free setup.
- Take control of your privacy. Use the workaround to create a local account and be deliberate in turning off unnecessary data collection during the OOBE setup.
Now that your operating system is up and running, your journey is just beginning. To continue optimizing your new system and ensuring its security, I encourage you to explore our other main categories. For more in-depth guides, explore our Productivity & Automation categories on Afdevinfo.


